
Mini Candy Corn Cheesecakes for Halloween Parties
Mini Candy Corn Cheesecakes – Fun Halloween Dessert Recipe
No reviews
- Author: Maria
Description
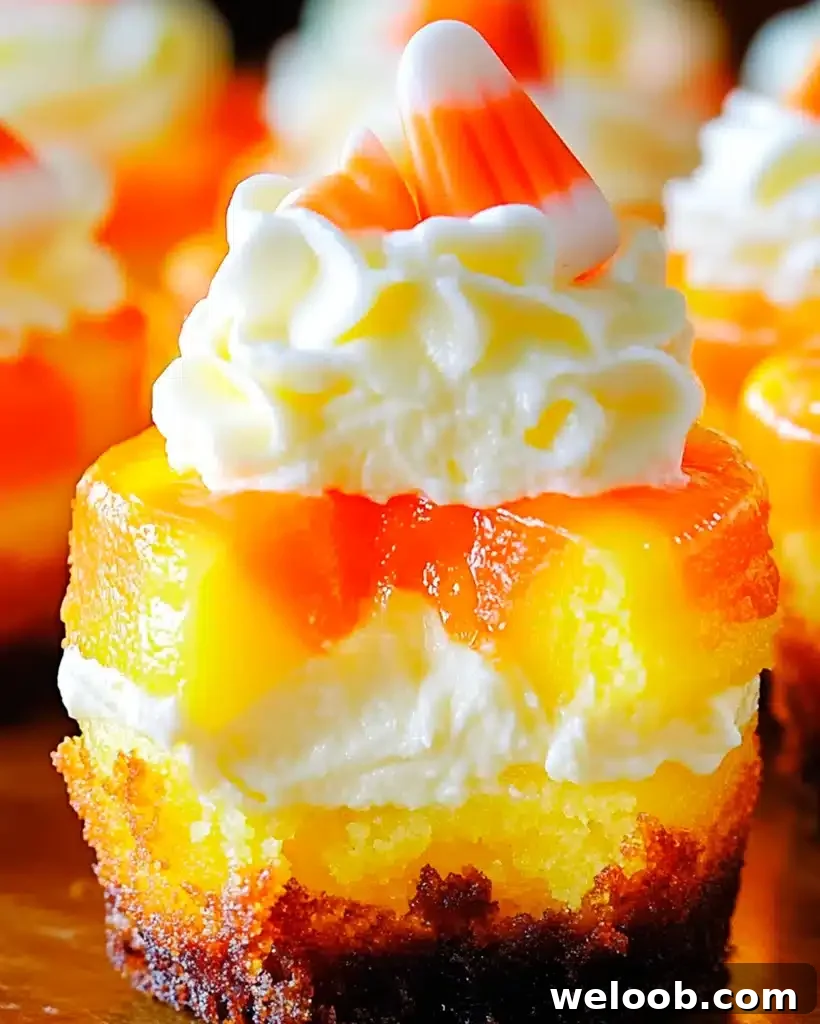
Mini Candy Corn Cheesecakes are a festive, bite-sized Halloween dessert that captures the bright, nostalgic colors of candy corn in three creamy layers. These mini cheesecakes combine a crisp Oreo crust with a smooth cheesecake filling tinted yellow, orange, and white to mimic the classic candy. Perfect for parties and seasonal gatherings, they’re easy to share and visually striking on a dessert table. This recipe is approachable for home bakers and delivers rich flavor with playful presentation.
Ingredients
For the Crust
- 1 1/2 cups (201g) Oreo crumbs
- 2 tbsp (41g) butter, melted
For the Filling
- 12 ounces (339g) cream cheese, room temperature
- 1/2 cup (104g) sugar
- 2 tbsp (16g) all-purpose flour
- 1/2 cup (115g) sour cream
- 1 1/2 tsp vanilla extract
- 2 large eggs
- Yellow gel food coloring
- Orange gel food coloring
For the Topping
- 1/2 cup (120ml) heavy whipping cream, cold
- 5 tbsp (36g) powdered sugar
- 1/2 tsp vanilla extract
- Orange gel food coloring (optional)
- Ghost toppers or Halloween sprinkles (optional)
Notes: You can substitute the crust with graham crackers, gingersnaps, or a gluten-free cookie crumb if needed. Gel food coloring gives brighter color with minimal impact on batter texture.
Instructions
Step 1: Prepare the Crust
Preheat the oven to 325°F (162°C). Line a standard muffin or cupcake pan with paper liners and lightly spray them with non-stick cooking spray. In a bowl, mix the Oreo crumbs with the melted butter until well combined and the mixture holds together when pressed. Divide the crumb mixture evenly among the liners, pressing about 2 tablespoons into the bottom of each to form a firm crust. Bake for 5 minutes, then remove and set aside to cool while you prepare the filling.
Step 2: Make the Cheesecake Filling
Lower the oven temperature to 300°F (148°C). In a large bowl, beat the room-temperature cream cheese, sugar, and flour on low speed until smooth—mixing slowly reduces the chance of incorporating too much air and helps prevent cracking. Scrape down the bowl, then add the sour cream and vanilla and continue to beat until fully combined. Add the eggs one at a time, mixing gently after each addition until the batter is silky.
Divide the finished batter evenly into three bowls. Leave one portion plain for the white layer. Tint one bowl with a small amount of orange gel food coloring until you reach the desired shade, and tint the other with yellow gel food coloring. Gel colors are concentrated, so add a little at a time.
Step 3: Layer the Batter
To recreate the candy corn look, layer the batters in each prepared crust: start with about one tablespoon of yellow batter, then add a tablespoon of orange, and finally top with the white batter. Each cup should be nearly full but avoid overfilling to prevent spills. Gently tap the pan on the counter to remove air bubbles and level the layers if needed.
Step 4: Bake the Cheesecakes
Bake the mini cheesecakes for approximately 15 minutes or until the centers are set but still slightly jiggly. Turn off the oven and leave the door closed for 10 minutes to allow gradual cooling—this reduces the risk of cracks. After 10 minutes, open the door slightly for 15–20 minutes to finish cooling, then transfer the cheesecakes to the refrigerator to chill for several hours or overnight until fully firm.
Step 5: Prepare the Whipped Topping
When ready to finish, whip the cold heavy cream with powdered sugar and vanilla until stiff peaks form. Add a touch of orange gel coloring if you want the whipped topping to match the candy corn theme. Pipe or spoon a small dollop onto each chilled mini cheesecake and decorate with ghost toppers, sprinkles, or a tiny candy corn for a festive touch.
Tips & Notes
- Avoid overmixing: Mix the batter on low and only until smooth. Overbeating incorporates air and can cause cracks.
- Chill completely: Refrigerate the cheesecakes for several hours or overnight. Chilled cheesecakes slice and decorate more cleanly.
- Color carefully: Use gel coloring sparingly for bright hues without changing batter consistency.
- Customize the crust: Swap cookies for graham crackers or a gluten-free alternative to suit dietary needs.
- Make ahead: These mini cheesecakes can be made up to 2 days in advance and stored in an airtight container in the refrigerator.
Serving Suggestions
Arrange the mini cheesecakes on a festive platter for Halloween gatherings. They pair well with warm beverages like hot chocolate or spiced apple cider and can be served alongside lighter items such as fresh fruit or vanilla ice cream to balance the richness. For an eye-catching display, place them in rows to mimic a candy corn gradient or scatter edible decorations for a playful touch.
Frequently Asked Questions
Can I prepare these ahead of time?
Yes — make the cheesecakes a day or two in advance and store them chilled in an airtight container. Add whipped topping and delicate decorations just before serving for the freshest appearance.
Do I need gel food coloring?
Gel coloring is recommended because it produces brighter colors with less liquid. If you only have liquid food coloring, use small amounts and be mindful of changing the batter texture.
How long will leftovers keep?
Stored in an airtight container in the refrigerator, these mini cheesecakes are best within 2–3 days.
Related Recipes
- No-Bake Orange Cheesecake
- Raspberry Cheesecake Bars
- Coconut Milk Mini Cheesecakes
Conclusion
Mini Candy Corn Cheesecakes are a delightful seasonal dessert that blends creamy cheesecake with the cheerful colors of candy corn. They’re easy to make, visually appealing, and ideal for Halloween parties, school events, or cozy autumn nights. Follow the steps and tips above for a successful bake, and feel free to adapt the flavors and decorations to suit your celebration. Happy baking!