
White Chocolate Pineapple Cake Recipe: Tropical Treat
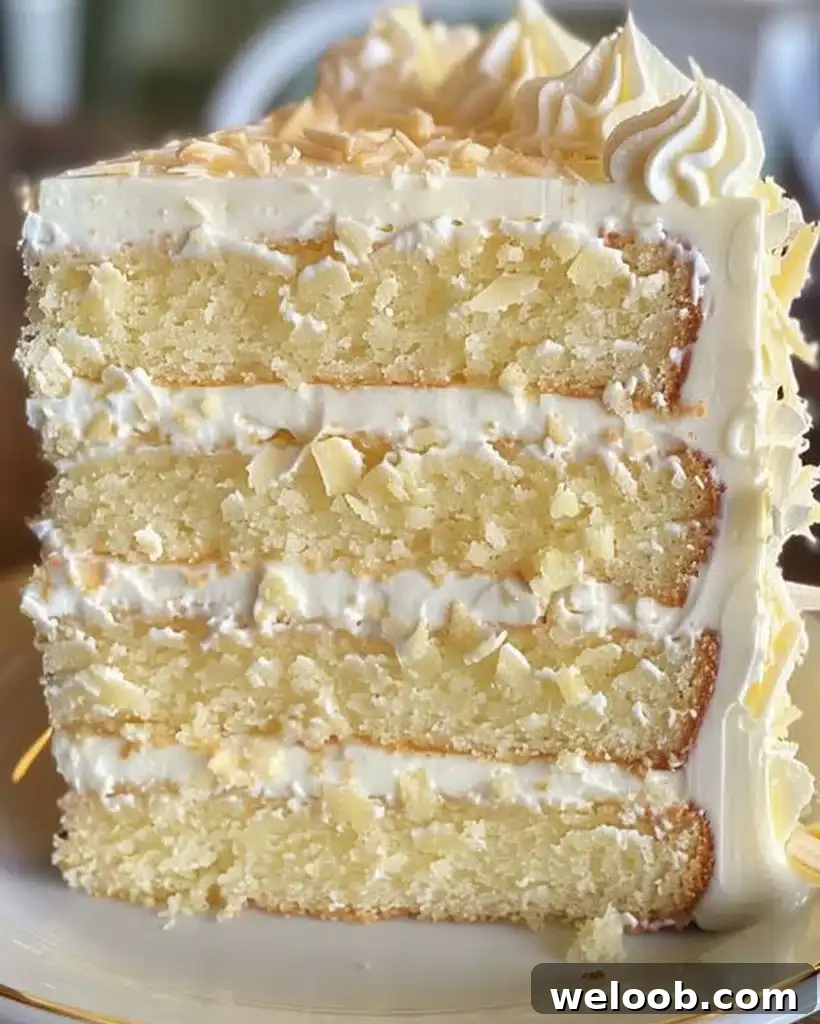
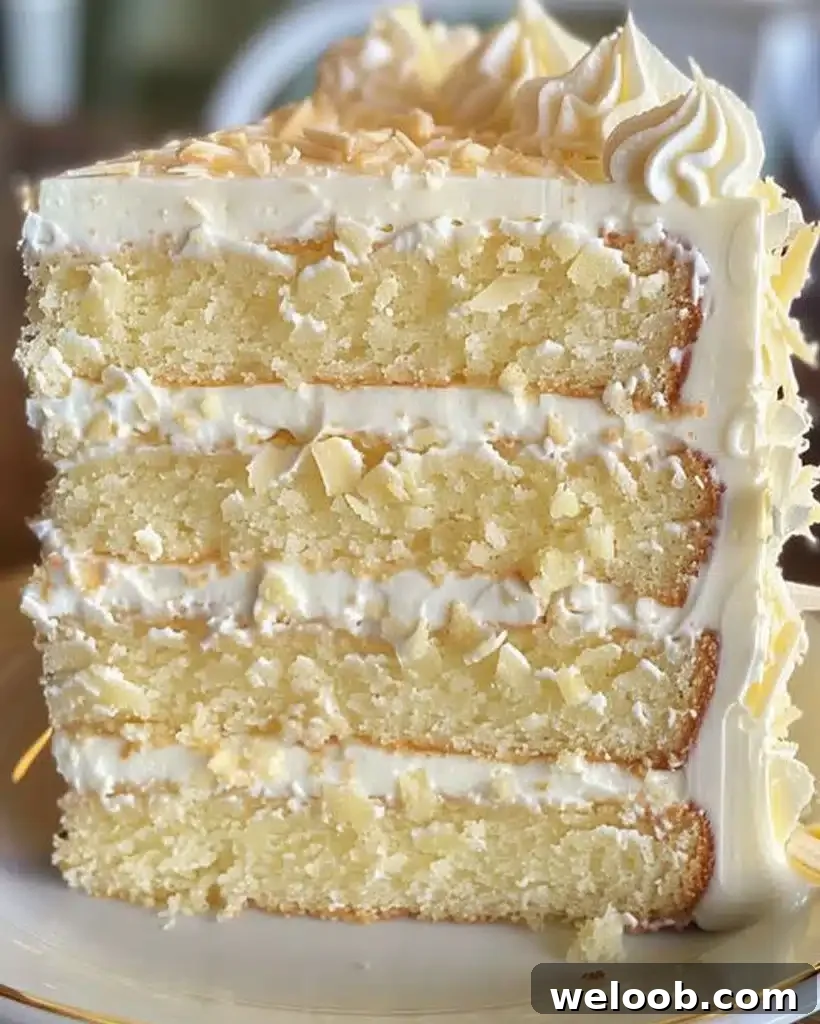
White Chocolate Pineapple Cake – Tropical Dessert Delight
- Author: Patricia
Introduction
Discover a light, tropical dessert that balances creamy white chocolate with bright pineapple: the White Chocolate Pineapple Cake. This layered cake combines moist, tender white chocolate cake with a jam-like pineapple filling and a silky vanilla white chocolate buttercream. It’s a refined twist on classic tropical desserts and works perfectly for birthdays, summer gatherings, or any time you want a show-stopping dessert with fresh fruit flavor.
The cake layers are tender and subtly sweet, the pineapple filling adds a lively tang, and the buttercream rounds everything out with smooth richness. The recipe is approachable and offers simple substitutions for dairy-free or gluten-free diets.
Ingredients
For the White Chocolate Cake
- 2 1/2 cups all-purpose flour
- 2 teaspoons baking powder
- 1/2 teaspoon salt
- 3/4 cup unsalted butter, room temperature
- 1 1/4 cups granulated sugar
- 4 large egg whites, room temperature
- 100g white chocolate, melted and cooled
- 1 cup whole milk, room temperature
- 1 teaspoon pure vanilla extract
For the Pineapple Filling
- 2 cups chopped fresh pineapple
- 1/4 cup granulated sugar
- 2 tablespoons cornstarch
- 1/2 teaspoon lemon zest
- 1 tablespoon lemon juice
For the Vanilla White Chocolate Buttercream
- 1 1/2 cups unsalted butter, room temperature
- 1–2 cups powdered sugar, sifted
- 200g white chocolate, melted and cooled
- 2 teaspoons pure vanilla extract
- 2–3 tablespoons heavy cream (adjust for consistency)
Optional Substitutions
- To make the cake dairy-free, use vegan butter and almond (or other plant) milk; use dairy-free white chocolate if available.
- To make the cake gluten-free, use a trusted 1:1 gluten-free flour blend in place of all-purpose flour.
Instructions
Step 1: Prepare the Pans
Preheat the oven to 350°F (175°C). Grease and flour four 8-inch round cake pans or line them with parchment.
Step 2: Combine Dry Ingredients
Whisk the flour, baking powder, and salt in a medium bowl to distribute the leavening evenly.
Step 3: Cream Butter and Sugar
In a large bowl, beat the butter and sugar on medium speed until light and fluffy, about 3–4 minutes. Add egg whites one at a time, mixing after each addition.
Step 4: Add White Chocolate and Vanilla
Stir in the melted, cooled white chocolate and vanilla extract until fully incorporated.
Step 5: Alternate Dry Ingredients and Milk
On low speed, add the flour mixture and milk in alternation, beginning and ending with the flour. Mix just until combined to avoid a dense crumb.
Step 6: Bake
Divide the batter evenly between the prepared pans and bake for 25–30 minutes, or until a toothpick inserted in the center comes out clean. Cool in the pans for 10 minutes, then transfer to a wire rack to cool completely.
Pineapple Filling
Step 1: Cook the Filling
In a saucepan, combine the chopped pineapple, sugar, cornstarch, lemon zest, and lemon juice. Cook over medium heat, stirring often, until the mixture thickens to a jam-like consistency, about 8–12 minutes.
Step 2: Cool
Remove from heat and let the filling cool completely before assembling to prevent it from melting the frosting.
Vanilla White Chocolate Buttercream
Step 1: Beat the Butter
Beat the butter until creamy, about 2 minutes.
Step 2: Add Sugar and White Chocolate
Gradually add the powdered sugar, 1/2 cup at a time, then beat in the melted white chocolate and vanilla until smooth.
Step 3: Adjust Consistency
If the frosting is too thick, add heavy cream 1 tablespoon at a time until spreadable and silky.
Assemble the Cake
Step 1: Layer
Place one cake layer on a plate. Spread a generous layer of cooled pineapple filling, taking care not to let it drip over the edges.
Step 2: Repeat
Add the remaining layers and filling until the stack is complete.
Step 3: Frost
Cover the cake with the vanilla white chocolate buttercream. Smooth with a spatula or cake scraper for a clean finish.
Step 4: Decorate
Top with white chocolate shavings, toasted coconut, or fresh pineapple slices for a polished presentation.
Tips & Notes
- Use room-temperature ingredients: They combine more evenly and create a better texture.
- Don’t overmix: Mix just until combined once dry ingredients are added to keep the cake tender.
- Cool the filling: Make sure the pineapple filling is fully cooled to prevent the frosting from slipping or melting.
- Chill for clean slices: Refrigerate the finished cake for 30 minutes before slicing to get neat, even pieces.
- Choose quality white chocolate: High-quality white chocolate melts and flavors the cake and frosting more smoothly.
Serving Suggestions
Serve slices with fresh pineapple, a dollop of whipped cream, or a scoop of vanilla ice cream. Light tropical drinks such as pineapple iced tea or a citrus spritzer complement this cake nicely.
Nutritional Information
Per serving (1 slice):
- Calories: 450
- Fat: 25g
- Carbohydrates: 55g
- Protein: 5g
- Sugar: 35g
Storage and Leftovers
Store the cake in an airtight container at room temperature for up to 3 days. For longer storage, refrigerate for up to 5 days—bring to room temperature before serving. To freeze, wrap individual slices tightly and keep in a freezer-safe container for up to 2 months; thaw overnight in the refrigerator.
Frequently Asked Questions
Can I use canned pineapple for the filling? Yes—drain well and pat dry before cooking to avoid excess liquid.
Can I make this cake gluten-free? Yes—swap in a trusted 1:1 gluten-free flour blend.
How can I reduce sweetness? Reduce the sugar in the batter and frosting by about 1/4 cup to suit your taste.
Can I use dark chocolate instead? You can, but it will change the flavor profile to a richer, less sweet cake.
Related Recipes
- White German Chocolate Cake with Coconut-Pecan Filling
- Cherry Chocolate Dream Cake – Moist & Delicious
Conclusion
The White Chocolate Pineapple Cake is a delightful tropical dessert that combines delicate white chocolate cake layers, bright pineapple filling, and a velvety vanilla buttercream. It’s elegant enough for special occasions and simple enough for an indulgent weeknight treat. Enjoy experimenting with decorations and substitutions to make this cake your own. Happy baking!