
Homemade White Chocolate Christmas Fudge Recipe
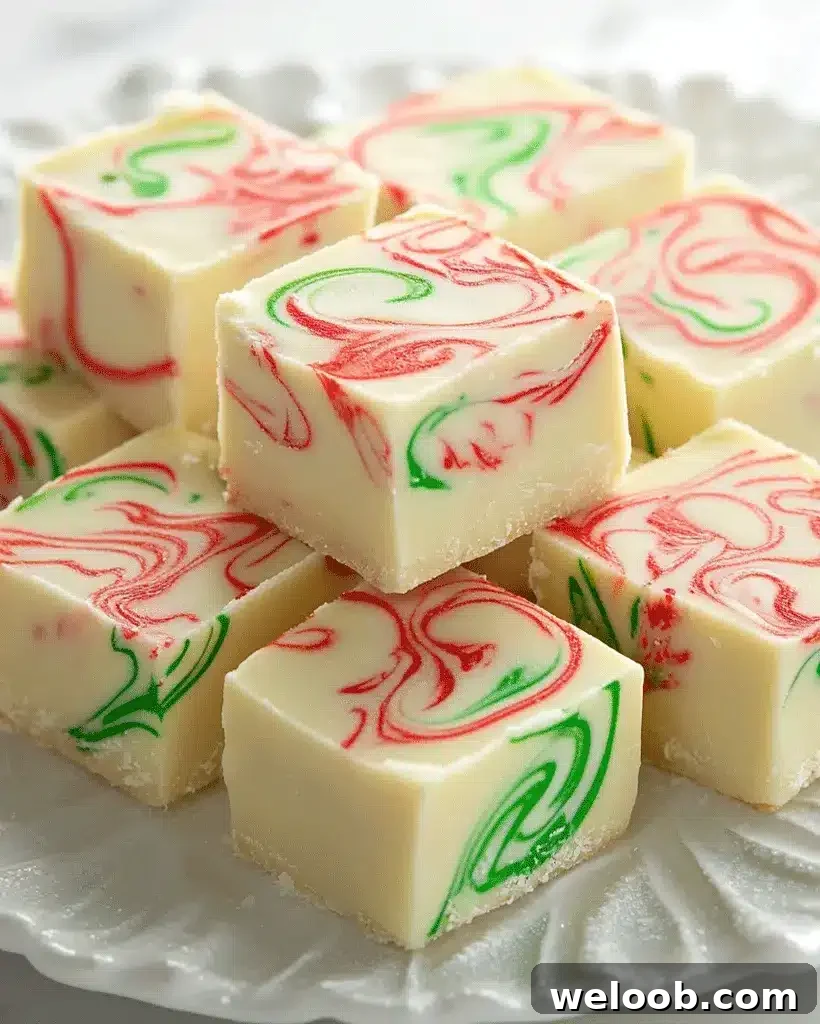
Hello, holiday bakers and fudge fans! The season for cozy gatherings and homemade gifts is here, and this White Chocolate Christmas Fudge is a perfect festive treat. Smooth, creamy white chocolate is tinted with red and green swirls for a cheerful marbled look. This easy recipe is beginner-friendly, requires just a few pantry staples, and makes an excellent gift, party dessert, or addition to a holiday platter. Follow the steps below for a reliably creamy, colorful fudge that’s sure to impress.
Introduction
White Chocolate Christmas Fudge is a festive variation on classic fudge: rich white chocolate blended with sweetened condensed milk, flavored with vanilla, and separated into red, green, and plain portions to create a holiday marble. It’s quick to prepare, looks beautiful on a dessert board, and can be customized with extracts, zest, or sprinkles. Because it sets in the refrigerator, it’s a great make-ahead sweet for holiday hosting and gifting.
Ingredients for White Chocolate Christmas Fudge
Gather these simple ingredients for a smooth, creamy batch of festive fudge:
- 3 cups white chocolate chips
Use a high-quality white chocolate for the best texture and flavor. - 1 (14-ounce) can sweetened condensed milk
This creates the glossy, fudgy texture. - 1/2 teaspoon vanilla extract
Adds depth and warmth. - Red and green food coloring
Gel colors are recommended for vivid tones without thinning the mixture. - 1/4 cup holiday sprinkles (optional)
For extra festivity — sprinkle on top before the fudge sets.
How to Make White Chocolate Christmas Fudge – Step by Step
This recipe takes roughly 10 minutes of active prep and a couple of hours to chill. Read through the steps first so everything goes smoothly.
Step 1: Prepare the Pan
Line an 8×8-inch baking dish with parchment paper, leaving an overhang on two sides to lift the fudge out easily after it sets.
Step 2: Melt the Chocolate
In a medium saucepan over low heat, combine the white chocolate chips and sweetened condensed milk. Stir constantly until the chocolate is fully melted and the mixture is smooth. Remove from heat and stir in the vanilla extract.
Step 3: Divide and Color the Fudge
Divide the warm chocolate mixture evenly into three small bowls. Tint one bowl with red food coloring and another with green. Leave the third plain. Stir until the colors are completely blended.
Step 4: Layer the Fudge
Spread the red layer into the prepared pan, then gently dollop the plain layer over it. Finish with the green layer. Use a knife or skewer to lightly swirl the layers, creating a marbled holiday effect. Don’t over-swirl if you want distinct color sections.
Step 5: Add Sprinkles (Optional)
Sprinkle the top with holiday sprinkles if desired, doing so immediately before the fudge begins to firm up so they adhere.
Step 6: Chill and Set
Refrigerate the pan for at least 2 hours, or until the fudge is firm. Use the parchment overhang to lift the block from the pan and cut into small squares. Store as directed below.
Helpful Tips for White Chocolate Christmas Fudge
Follow these tips for a smooth, stable fudge:
- Choose quality white chocolate. Premium chips or chopped couverture melt more evenly and give a creamier texture.
- Melt gently over low heat. High heat can cause white chocolate to scorch or seize; stir constantly.
- Use gel food coloring. Gel provides brighter colors with less liquid, preserving the fudge’s texture.
Cooking Tips for the Best White Chocolate Christmas Fudge
- Use a heavy-bottomed saucepan. It helps distribute heat evenly and prevents hot spots.
- Stir continuously while melting. This reduces the risk of overheating and ensures a silky finish.
- Allow full chilling time. Thorough refrigeration makes the fudge easier to cut and improves the texture.
Serving Suggestions for White Chocolate Christmas Fudge
Serve and share this festive fudge in these ways:
- Pair with warm drinks. Hot cocoa, coffee, or spiced tea balance the sweetness nicely.
- Arrange on a dessert platter. Combine with cookies, peppermint bark, or gingerbread for a seasonal spread.
- Package for gifts. Cut into squares, place in small boxes or bags, and tie with ribbon for homemade holiday gifts.
Nutritional Information
Approximate per serving:
- Calories: 130
- Fat: 6g
- Saturated Fat: 4g
- Carbohydrates: 18g
- Sugar: 16g
- Protein: 2g
Storage and Leftovers for White Chocolate Christmas Fudge
- Refrigerate: Store in an airtight container in the fridge for up to one week to keep the fudge firm and fresh.
- Freeze: Wrap tightly in plastic wrap and place in a freezer-safe container for up to three months. Thaw in the refrigerator overnight before serving.
- Serve at room temperature: If you prefer softer fudge, let pieces sit at room temperature for 10–15 minutes before serving.
Frequently Asked Questions (FAQs) for White Chocolate Christmas Fudge
1. Can I use milk or dark chocolate instead?
Yes. Substitute milk or dark chocolate if you prefer a different flavor profile. Note that colored layers won’t show as vividly over darker chocolate.
2. Can I add other flavors?
Absolutely. A few drops of peppermint extract, a touch of almond extract, or some orange zest can add a festive twist.
3. How long will this fudge keep?
Stored in the refrigerator, it stays fresh about one week; frozen, up to three months.
4. Is food coloring required?
No. If you’d rather keep the fudge classic white, simply omit the coloring.
Related Recipes for White Chocolate Christmas Fudge Lovers
- Glazed Fruitcake Shortbread Cookies — Festive Holiday Treat
- Strawberry Lemon Blondies — Sweet & Citrusy Bars
Conclusion
This White Chocolate Christmas Fudge is an easy, festive sweet that comes together quickly and makes a big holiday impression. Creamy, colorful, and customizable, it’s perfect for dessert boards, homemade gifts, or a special holiday treat. Enjoy the process, add your own signature touches, and happy holidays from our kitchen to yours!
White Chocolate Christmas Fudge – Festive Holiday Treat
- Author: Patricia