
Soft Chewy Peanut Butter Cookies with Butterfinger Pieces
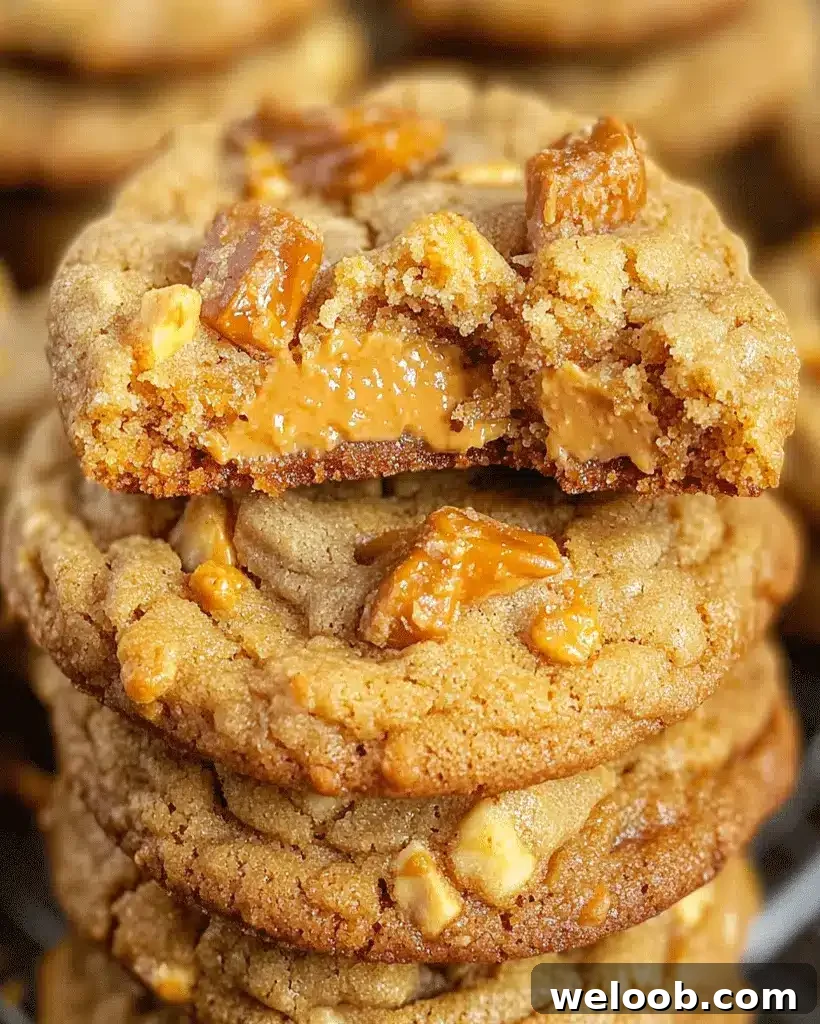

Peanut Butter Butterfinger Cookies – Soft & Chewy Recipe
No reviews
- Author: Patricia
Description
Welcome to another delicious baking adventure. If you love peanut butter and the crisp, chocolate-coated crunch of Butterfinger candy, these Peanut Butter Butterfinger Cookies are for you. They combine a soft, chewy peanut butter cookie base with generous chunks of crunchy Butterfinger pieces for a contrast of textures and flavors in every bite. This straightforward recipe is ideal for family gatherings, bake sales, or an indulgent snack at home. The cookies are easy to make and deliver a crowd-pleasing balance of nutty, sweet, and crispy elements.
Ingredients
- 1 cup unsalted butter, softened
- 1 cup granulated sugar
- 1 cup packed brown sugar
- 2 large eggs
- 1 teaspoon vanilla extract
- 1 cup creamy peanut butter
- 2 1/2 cups all-purpose flour
- 1 teaspoon baking soda
- 1/2 teaspoon salt
- 2 cups chopped Butterfinger candy bars
Optional substitutions:
- For gluten-free cookies, substitute the all-purpose flour with a 1:1 gluten-free baking blend.
- Use a plant-based butter substitute to make a dairy-free version.
- Swap peanut butter for almond butter if you prefer — the texture will be similar but the flavor will differ.
Instructions
Step 1: Preheat the oven
Preheat the oven to 350°F (175°C). Line a baking sheet with parchment paper or use a lightly greased baking sheet for easy cleanup.
Step 2: Cream butter and sugars
In a large bowl, cream together 1 cup softened unsalted butter, 1 cup granulated sugar, and 1 cup packed brown sugar until light and fluffy, about 2–3 minutes with a hand mixer or stand mixer.
Step 3: Add eggs and vanilla
Add 2 large eggs, one at a time, beating well after each addition. Stir in 1 teaspoon vanilla extract.
Step 4: Add the peanut butter
Mix in 1 cup creamy peanut butter until smooth and fully incorporated, scraping the bowl as needed to ensure an even mixture.
Step 5: Combine dry ingredients
In a separate bowl, whisk together 2 1/2 cups all-purpose flour, 1 teaspoon baking soda, and 1/2 teaspoon salt. Gradually add the dry ingredients to the wet mixture on low speed, mixing just until combined. Avoid overmixing to keep the cookies tender.
Step 6: Fold in Butterfinger pieces
Gently fold in 2 cups chopped Butterfinger candy bars so the candy is evenly distributed through the dough. Chop into small, bite-sized pieces for consistent texture.
Step 7: Scoop and bake
Using a cookie scoop or tablespoon, portion dough onto the prepared baking sheet about 2 inches apart to allow for spreading. Bake for 10–12 minutes or until the edges are golden brown. The centers may look slightly soft but will firm up as the cookies cool.
Step 8: Cool and serve
Let the cookies cool on the baking sheet for about 5 minutes, then transfer to a wire rack to cool completely. Serve warm, or let them cool and store as directed below.
Helpful tips
- Room-temperature ingredients: Use room-temperature butter and eggs so they combine smoothly and create a lighter, chewier dough.
- Avoid overmixing: Once the flour is in, mix just until combined. Overmixing can produce dense, tough cookies instead of soft, chewy ones.
- Evenly chopped candy: Chop Butterfinger bars into small, consistent pieces so each cookie gets a good balance of candy to dough.
Cooking tips for best results
- Chill the dough: If time allows, chill the dough for 30 minutes to reduce spreading and to develop a chewier texture.
- Use a cookie scoop: A cookie scoop ensures uniform sizes so cookies bake evenly.
- Adjust baking time: For slightly crunchier cookies, bake 1–2 minutes longer. For very soft cookies, remove them from the oven as soon as the edges turn golden, even if centers appear soft.
Serving suggestions
- With milk: These cookies are classic with a glass of cold milk.
- Ice cream sandwiches: Pair two cookies with a scoop of vanilla or chocolate ice cream for an indulgent treat.
- Crumble as topping: Crumble cookies over ice cream or yogurt for added crunch and flavor.
- Holiday platters: Add them to dessert trays for parties and holidays — their mix of textures makes them a favorite.
Nutritional information
These cookies are a sweet indulgence and do offer some protein from the peanut butter. Approximate nutrition per cookie (1 cookie):
- Calories: 280 kcal
- Total fat: 15 g
- Saturated fat: 7 g
- Cholesterol: 30 mg
- Sodium: 180 mg
- Total carbohydrates: 35 g
- Sugars: 22 g
- Protein: 4 g
Storage and leftovers
- Room temperature: Store in an airtight container up to 5 days to keep them soft and chewy.
- Freezing: Freeze for up to 3 months. Wrap individual cookies tightly, then place in a freezer-safe bag or container.
- Reheating: Warm a cookie for 10–15 seconds in the microwave to revive that fresh-baked feel.
Frequently asked questions
1. Can I use crunchy peanut butter instead of creamy?
Yes. Crunchy peanut butter adds extra texture and complements the candy pieces for a more pronounced crunch.
2. How can I make these cookies gluten-free?
Replace the all-purpose flour with a 1:1 gluten-free baking blend designed for cookies. Follow the same measurements and method.
3. Can I freeze the dough for later?
Yes. Form the dough into balls, freeze on a baking sheet, then transfer to a sealed bag. When ready to bake, add 1–2 minutes to the baking time if baking from frozen.
4. Can I use different candy bars?
Absolutely. Swap Butterfinger pieces for other chopped candy bars like Snickers or Reese’s to create variations, though the flavor and texture will change.
Related recipes
- Glazed Fruitcake Shortbread Cookies – Festive Holiday Treat
- Apple Sauce Spice Cake Bars – Easy Fall Dessert
- Pumpkin Oatmeal Chocolate Chip Cookies – Soft & Chewy
Conclusion
These Peanut Butter Butterfinger Cookies are a simple, satisfying bake that combines a soft, chewy peanut butter dough with crunchy Butterfinger pieces. They’re easy to make and perfect for sharing, gifting, or enjoying with a cold glass of milk. Try the suggested substitutions and serving ideas to make the recipe your own. Happy baking and enjoy every bite!