
Peanut Butter Truffles Recipe: Homemade Chocolate Bites
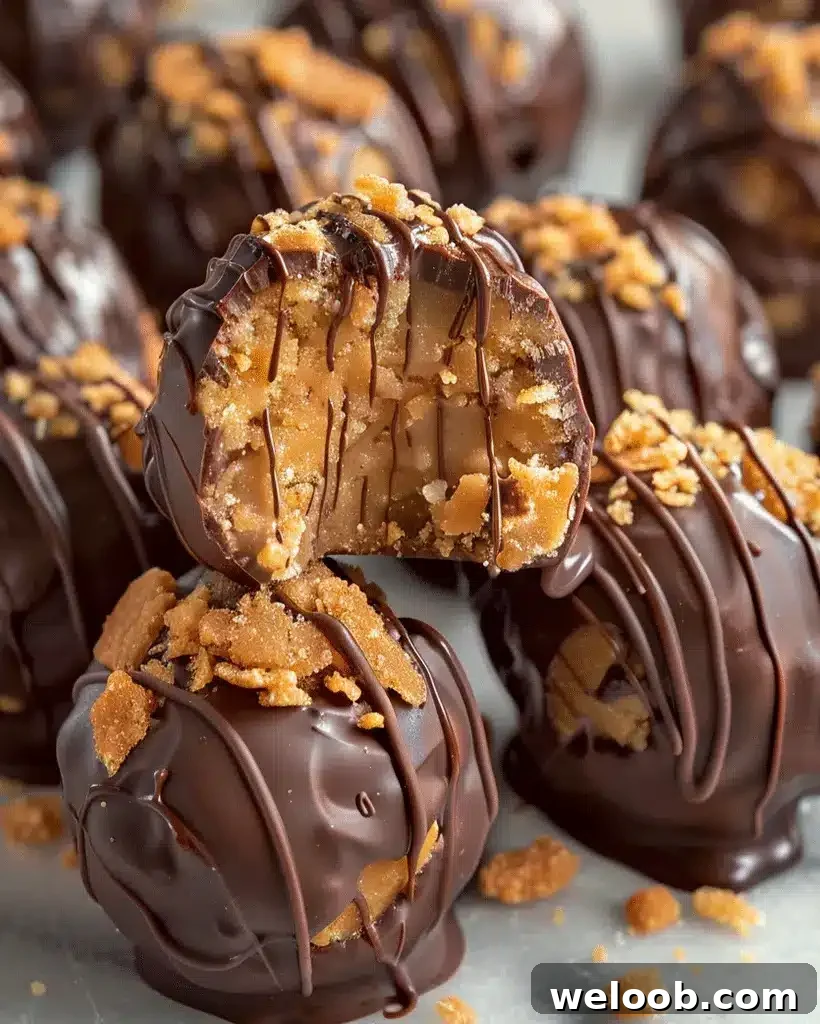

Peanut Butter Truffles Recipe – Easy Homemade Treats
Author: Patricia
Introduction
These Peanut Butter Chocolate Truffles—also called Peanut Butter Chocolate Bliss Bites—pair smooth peanut butter with rich semi-sweet chocolate for a no-bake treat that’s simple to make and impossible to resist. They’re ideal for parties, gifts, or a cozy dessert at home. With just a handful of pantry ingredients and minimal hands-on time, you can produce elegant, bakery-quality truffles that satisfy both peanut butter and chocolate lovers.
Ingredients for Peanut Butter Chocolate Truffles
Gather the ingredients below for about 24 bite-sized truffles:
- 1 cup creamy peanut butter
- 1/2 cup powdered sugar
- 1/2 teaspoon vanilla extract
- 1/4 teaspoon salt
- 1 cup crushed graham crackers (or digestive biscuits)
- 1 1/2 cups semi-sweet chocolate chips
- 1 tablespoon coconut oil (optional, for a smoother chocolate coating)
- Crushed peanuts or cookie crumbs, for garnish (optional)
Optional substitutions:
- For a nut-free option, substitute peanut butter with sunflower seed butter.
- Use gluten-free graham crackers if needed.
- Replace powdered sugar with coconut sugar for a refined-sugar-free version (texture may vary).
How to Make Peanut Butter Chocolate Truffles – Step by Step
Step 1: Prepare the peanut butter mixture
In a large bowl, combine the creamy peanut butter, powdered sugar, vanilla extract, salt, and crushed graham crackers. Stir until the mixture forms a thick, pliable dough. If the mixture is too sticky, add a little more crushed crackers a tablespoon at a time.
Step 2: Shape the truffles
Use a small scoop or spoon to portion the dough and roll into bite-sized balls. Place the balls on a parchment-lined tray. Freeze the tray for about 30 minutes so the truffles firm up and hold their shape during dipping.
Step 3: Melt the chocolate
While the truffles chill, melt the semi-sweet chocolate chips with the optional coconut oil. Heat in a microwave-safe bowl in 15-second intervals, stirring between each interval, until smooth. Alternatively, melt the chocolate over a double boiler (a heatproof bowl set over simmering water) for gentler, even melting.
Step 4: Dip and garnish
Remove the chilled truffles from the freezer. Using a fork or dipping tool, coat each truffle in the melted chocolate and let excess drip off. Return the coated truffles to the parchment-lined tray and sprinkle immediately with crushed peanuts or cookie crumbs for added texture.
Step 5: Set and serve
Refrigerate the truffles for at least 1 hour, or until the chocolate is fully set. Serve chilled or at room temperature. The truffles deliver a pleasing contrast of creamy peanut butter and crisp chocolate in every bite.
Helpful tips for perfect truffles
- Work quickly: Dip truffles in batches so the centers don’t soften before the chocolate sets.
- Chill tools: Keep your dipping fork or spoon cool to help chocolate maintain its glossy texture.
- Flavor variations: Add a pinch of flaky sea salt, a dash of cinnamon, or a splash of espresso to the peanut butter mix for an interesting twist.
- Storage: Store truffles in an airtight container in the refrigerator for up to two weeks, or freeze for longer storage.
Cooking tips for the best results
- Use high-quality chocolate for a smoother coating and richer flavor.
- For perfectly round truffles, quickly roll the chilled balls between your palms before dipping.
- Consider a white chocolate drizzle or cocoa dusting to elevate presentation.
- If you lack a double boiler, place a heatproof bowl over a pot of simmering water to melt chocolate evenly and avoid scorching.
Serving suggestions
Peanut Butter Chocolate Truffles are versatile and elegant:
- Arrange on a dessert platter with fresh fruit and nuts for gatherings.
- Serve alongside coffee or tea—the chocolate and peanut butter pair beautifully with hot drinks.
- Package in small boxes or bags as homemade gifts for holidays and celebrations.
- For parties, display truffles on a tiered stand for an attractive centerpiece.
Nutritional information (approximate, per truffle)
- Calories: 140
- Total fat: 9 g
- Saturated fat: 3 g
- Cholesterol: 0 mg
- Sodium: 85 mg
- Total carbohydrates: 14 g
- Dietary fiber: 1 g
- Sugars: 9 g
- Protein: 3 g
Storage and leftovers
- Refrigeration: Store truffles in an airtight container in the refrigerator for up to two weeks. Let them sit at room temperature a few minutes before serving for softer centers.
- Freezing: For longer storage, freeze truffles in a tightly sealed container for up to three months. Thaw in the refrigerator before serving.
- Serving from cold: Truffles taste best slightly chilled or at cool room temperature.
Frequently Asked Questions (FAQs)
Can I use crunchy peanut butter instead of creamy?
Yes. Crunchy peanut butter adds extra texture and flavor—just stir it well before combining with the other ingredients.
What can I use instead of graham crackers?
Crushed digestive biscuits, graham-style cookies, or even crushed pretzels work well and change the flavor profile slightly.
How do I prevent the chocolate from cracking?
Avoid dipping extremely cold truffles into hot chocolate. Allow truffles to warm a few minutes at room temperature if they’re too firm, and use a tempered or gently melted chocolate for a stable coating.
Can I make these gluten-free?
Yes. Substitute gluten-free graham crackers or gluten-free cookies to keep the recipe gluten-free.
Related ideas
If you enjoy these truffles, try pairing them with other homemade treats—think cinnamon-swirled banana bread, mini savory bites for parties, or simple chocolate-dipped fruits to expand your dessert offerings.
Conclusion
Peanut Butter Chocolate Truffles are a quick, crowd-pleasing dessert that combines creamy peanut butter and chocolate into elegant, bite-sized sweets. They’re easy to adapt—swap fillings, toppings, or coatings to create your own signature version. Try the recipe, experiment with flavors, and enjoy sharing these homemade delights with friends and family.