
Cinnamon Rolls Recipe: Soft, Homemade and Gooey
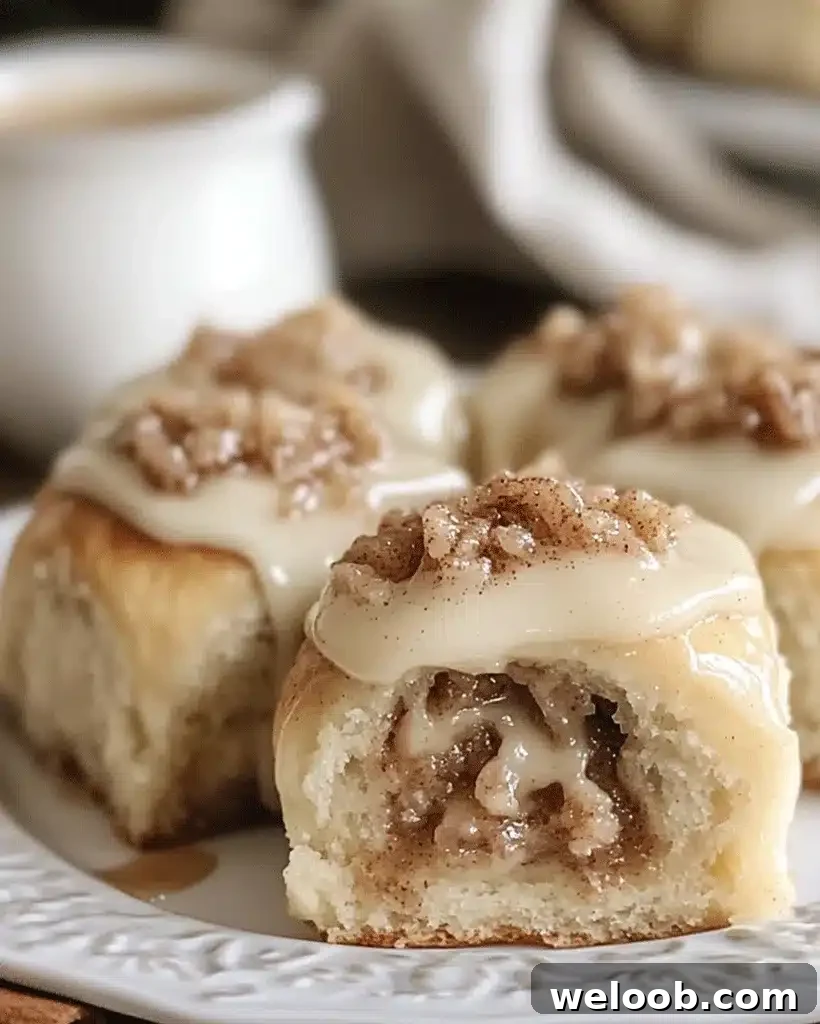
Who doesn’t love the comforting aroma of freshly baked cinnamon rolls filling the kitchen? Whether you’re waking up on a chilly morning or enjoying a relaxed weekend evening, soft, sweet cinnamon rolls topped with creamy frosting are a timeless favorite. This easy-to-follow cinnamon rolls recipe produces bakery-style results at home and makes a wonderful treat to share with family and friends. Let’s get baking!
Introduction
Cinnamon rolls are a classic baked good with roots in European baking traditions and a place as a beloved comfort food around the world. Their tender, slightly chewy dough and warm spiced filling make them perfect for breakfast, brunch, dessert, or any cozy gathering. This recipe walks you step-by-step through preparing the dough, filling, baking, and finishing with a rich cream cheese frosting so you can make bakery-quality cinnamon rolls at home.
Ingredients for Cinnamon Rolls
Dough:
- 4 cups all-purpose flour
- 1/3 cup granulated sugar
- 1 packet (2 1/4 tsp) active dry yeast
- 1 cup warm milk (about 110°F / 43°C)
- 1/4 cup unsalted butter, melted
- 2 large eggs
- 1/2 teaspoon salt
Filling:
- 1/2 cup unsalted butter, softened
- 3/4 cup brown sugar, packed
- 2 tablespoons ground cinnamon
Cream Cheese Frosting:
- 4 ounces cream cheese, softened
- 2 tablespoons unsalted butter, softened
- 1 cup powdered sugar
- 1 teaspoon vanilla extract
Optional: For a vegan variation, substitute dairy-free butter and a plant-based milk and use a vegan cream cheese for the frosting.
How to Make Cinnamon Rolls – Step by Step
Step 1: Make the Dough
- In a large bowl, combine the warm milk, yeast, and 1 tablespoon of sugar. Let sit for about 5 minutes until the mixture becomes foamy.
- Add the melted butter, eggs, remaining sugar, and salt, mixing to combine.
- Gradually add the flour, stirring until a soft dough forms.
- Turn the dough onto a lightly floured surface and knead for 5–7 minutes until smooth and elastic.
- Place the dough in a lightly greased bowl, cover, and let rise in a warm place for 1–2 hours, or until doubled in size.
Step 2: Prepare the Filling
- In a small bowl, mix the softened butter, brown sugar, and ground cinnamon until the mixture is uniform and spreadable.
Step 3: Assemble the Rolls
- On a lightly floured surface, roll the dough into a 12×16-inch (30×40 cm) rectangle.
- Spread the cinnamon filling evenly over the surface, leaving a small border at the top edge.
- Starting at one long side, roll the dough tightly into a log. Pinch the seam to seal.
- Cut the log into 12 even pieces using a sharp knife or bench scraper.
Step 4: Second Rise
- Arrange the rolls in a greased 9×13-inch (23×33 cm) baking dish, spacing them evenly.
- Cover and let rise for another 30 minutes in a warm place until puffy.
Step 5: Bake
- Preheat the oven to 350°F (175°C).
- Bake the rolls for 20–25 minutes, or until the tops are golden brown and the centers are cooked through. Avoid overbaking to keep the rolls soft and gooey.
Step 6: Prepare the Frosting
- Beat together the softened cream cheese and butter until smooth. Add the powdered sugar and vanilla extract and beat until creamy and well combined.
- Spread the frosting over the warm rolls so it melts slightly into the swirls, or serve it on the side if you prefer less glaze.
Helpful Tips for Perfect Cinnamon Rolls
- Use warm (not hot) milk to activate the yeast without killing it; around 105–115°F (40–46°C) is ideal.
- For consistent, even rolls, roll the dough into a uniform rectangle and cut pieces of equal width.
- If you prefer extra gooey centers, remove the rolls from the oven just as they turn golden and still feel slightly soft in the middle.
- A bench scraper makes clean, even cuts and helps keep the roll shapes intact.
- Line the pan with parchment paper for easier removal and less sticking.
- Add a pinch of nutmeg or ground cardamom to the filling for a subtle warm spice note.
Serving Suggestions
Serve cinnamon rolls warm with a cup of coffee or tea. For a heartier breakfast, pair them with fresh fruit, yogurt, or a simple omelet. They also make an indulgent dessert served alongside vanilla ice cream or a dollop of whipped cream.
Nutritional Information
Each cinnamon roll contains approximately 380–385 calories, making these rolls an indulgent but satisfying treat.
Approximate nutrition per roll:
- Calories: 380 kcal
- Protein: 5 g
- Carbohydrates: 54 g
- Fat: 15 g
- Sugar: 29 g
Storage and Reheating
- Storing: Keep leftover rolls in an airtight container at room temperature for up to 2 days, or refrigerate for up to 5 days.
- Freezing: Fully assembled, unbaked rolls can be frozen after shaping; thaw overnight in the refrigerator and allow a final rise before baking. Baked rolls also freeze well—wrap individually and thaw before reheating.
- Reheating: Warm a roll in the microwave for 20–30 seconds, then refresh in a 300°F (150°C) oven for 5–7 minutes for best texture.
Frequently Asked Questions (FAQs)
Q: Can I prepare the dough ahead of time?
A: Yes. You can prepare the dough and refrigerate it overnight for a slow, cold rise. Bring it to room temperature, shape, and proceed with the final rise before baking.
Q: Can I freeze the rolls?
A: Absolutely. Freeze the assembled rolls before the second rise or freeze fully baked rolls. Thaw overnight in the refrigerator and finish the rise if needed before baking, or reheat baked rolls gently.
Q: How do I ensure soft rolls?
A: Knead until the dough is smooth and elastic and allow adequate rising time. Do not overbake; remove the rolls when they are just golden for the softest texture.
Q: Can I add extras like nuts or raisins?
A: Yes. Sprinkle chopped nuts, raisins, or chopped walnuts over the filling before rolling for added texture and flavor.
Related Recipes
- Raspberry White Chocolate Scones
- Decadent No-Bake Truffle Treats
Conclusion
Baking cinnamon rolls at home fills your kitchen with warmth and yields a comforting, crowd-pleasing treat. This recipe is approachable for beginners and reliable for experienced bakers—follow the steps, use quality ingredients, and don’t be afraid to personalize the filling or frosting. Enjoy the process and happy baking!