
No-Bake Easter Jello Pie Recipe – Creamy Layered Dessert
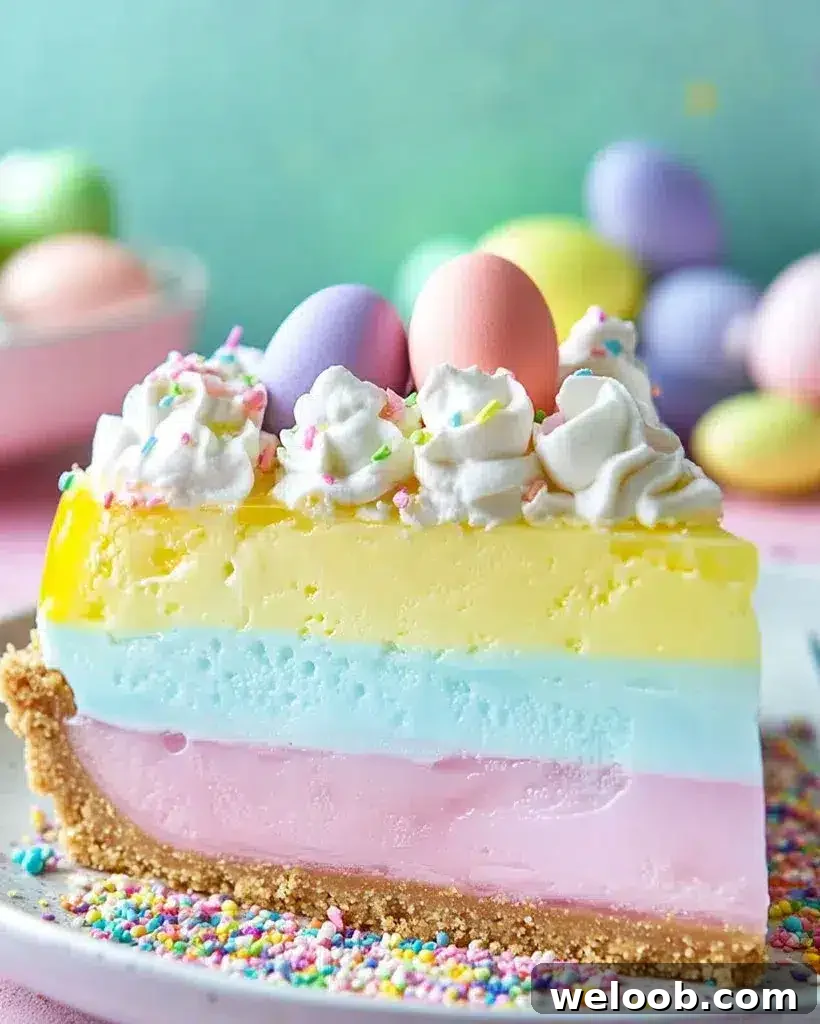

Easter Jell-O Pie — Easy Pastel Layered Dessert
Author: Patricia
Description
Spring celebrations call for bright, colorful desserts, and this Easter Jell-O Pie is a cheerful, crowd-pleasing choice. Layers of pastel gelatin blended with creamy vanilla yogurt and whipped topping create a silky, refreshing texture that’s both light and indulgent. The recipe is mostly no-bake (the graham cracker crust can be baked or chilled), simple to assemble, and perfect for make-ahead entertaining.
Why You’ll Love This Easter Jell-O Pie
- Beautiful pastel layers ideal for Easter, spring brunches and seasonal gatherings.
- Light, creamy texture: fruity Jell-O balanced with vanilla yogurt and whipped topping for a smooth mouthfeel.
- Simple ingredients and easy steps — great for cooks of any level.
- Make-ahead friendly: assemble the day before to save time on the holiday.
- Kid-friendly and fun to assemble together with little helpers.
Ingredients
For the Crust
- 1 1/2 cups crushed graham crackers
- 1/4 cup melted butter
Jell-O Layers
- 3 flavored Jell-O packets (choose pink, blue and yellow or other pastel options)
- 3 cups boiling water (1 cup per Jell-O packet)
- 3 cups cold water (1 cup per Jell-O packet)
- 1 1/2 cups whipped topping, divided (about 1/2 cup per layer)
- 1 1/2 cups vanilla yogurt, divided (about 1/2 cup per layer)
Whipped Cream Topping
- 1 cup heavy whipping cream
- 1/2 cup powdered sugar
- 1 teaspoon vanilla extract
Garnish
- Pastel sprinkles
- Pastel chocolate eggs or other seasonal candies
Step-by-Step Instructions
Step 1: Prepare the Graham Cracker Crust
- Preheat the oven to 350°F (175°C). If you prefer a no-bake crust, skip the oven and chill the crust in the refrigerator.
- In a bowl, combine the crushed graham crackers and melted butter until evenly moistened.
- Press the mixture firmly into the bottom of a 9-inch pie dish to form an even crust.
- Bake for about 8 minutes, then remove and let cool completely. For a no-bake option, press the crust into the dish and chill for at least 30 minutes.
Step 2: Prepare the Jell-O Layers
- Prepare each Jell-O flavor separately. For each packet: dissolve one Jell-O packet in 1 cup of boiling water, stir until fully dissolved, then add 1 cup cold water. Allow the mixture to cool slightly so it is warm but not hot.
- Divide the whipped topping and vanilla yogurt so each layer gets roughly 1/2 cup whipped topping plus 1/2 cup vanilla yogurt. Stir the cooled Jell-O into the whipped topping and yogurt mixture until smooth and uniform in color.
Step 3: Assemble the Layers
- Pour the first (pink) Jell-O mixture over the cooled crust and spread gently to level the layer.
- Refrigerate for 30 minutes or until the layer is set.
- Repeat with the second (blue) Jell-O mixture and chill another 30 minutes.
- Finish with the third (yellow) Jell-O mixture and chill for at least 1 hour, or preferably 4 hours to overnight, to ensure the layers are fully set before topping.
Step 4: Make the Whipped Cream Topping
- In a mixing bowl, combine 1 cup heavy whipping cream, 1/2 cup powdered sugar and 1 teaspoon vanilla extract.
- Beat on high with an electric mixer until stiff peaks form, about 3–5 minutes.
- Spread the whipped cream over the chilled pie, smoothing to the edges.
Step 5: Garnish & Chill
- Decorate the top with pastel sprinkles and pastel chocolate eggs or your choice of seasonal candies.
- Refrigerate the assembled pie at least 4 hours before serving; overnight chilling yields the best set and flavor melding.
Pro Tips for Best Results
- Use clear mixing bowls so you can see color and texture while combining layers.
- Allow each layer to set completely before adding the next to avoid color bleeding.
- To slice clean pieces, warm a large knife in hot water, dry it, then slice; repeat warming between cuts.
- For extra flavor, add a few drops of vanilla or almond extract to the Jell-O mixture before cooling.
- If you need a gluten-free crust, use gluten-free graham cracker crumbs or an alternative gluten-free cookie crumb.
Serving Suggestions
Serve chilled with an extra dollop of whipped cream, and consider a side of fresh berries such as raspberries, strawberries or blueberries to complement the fruity layers. A hot beverage like tea or coffee pairs nicely for guests who prefer warm drinks alongside a cold dessert.
Nutritional Information (Per Serving)
- Calories: 320 kcal
- Carbohydrates: 38 g
- Fat: 15 g
- Protein: 4 g
- Sugar: 25 g
Note: Nutritional values are approximate and will vary depending on specific brands and portion size.
Storage & Leftovers
How long does Easter Jell-O Pie last?
- Refrigerator: Store covered in an airtight container for up to 5 days.
- Freezer: Freezing is not recommended, as gelatin changes texture when frozen and thawed.
Make-ahead
This pie is an excellent make-ahead dessert. Prepare it a day in advance to allow the layers to set completely and flavors to meld, making holiday day prep stress-free.
Frequently Asked Questions (FAQs)
Can I use different Jell-O flavors?
Yes. Feel free to use any flavors you like—citrus, grape, lime or other pastel-friendly options work well. Just be mindful of color contrast between layers.
Do I have to make it gluten-free?
Not necessarily, but it’s easy to make gluten-free by choosing gluten-free graham cracker crumbs or alternate cookie crumbs for the crust.
What if I don’t have vanilla yogurt?
Substitute Greek yogurt, a vanilla-flavored pudding, or a mix of yogurt and a little sour cream for creaminess; adjust sweetness to taste.
Conclusion
This Easter Jell-O Pie is a simple, festive dessert that’s perfect for spring gatherings, potlucks, and family celebrations. With pastel layers, a creamy filling and playful garnishes, it offers attractive presentation and easy preparation. Try it as a make-ahead treat and enjoy the compliments from friends and family.
Happy Easter and happy baking!