
Cheesy Bombs Recipe: Gooey Appetizer Bites
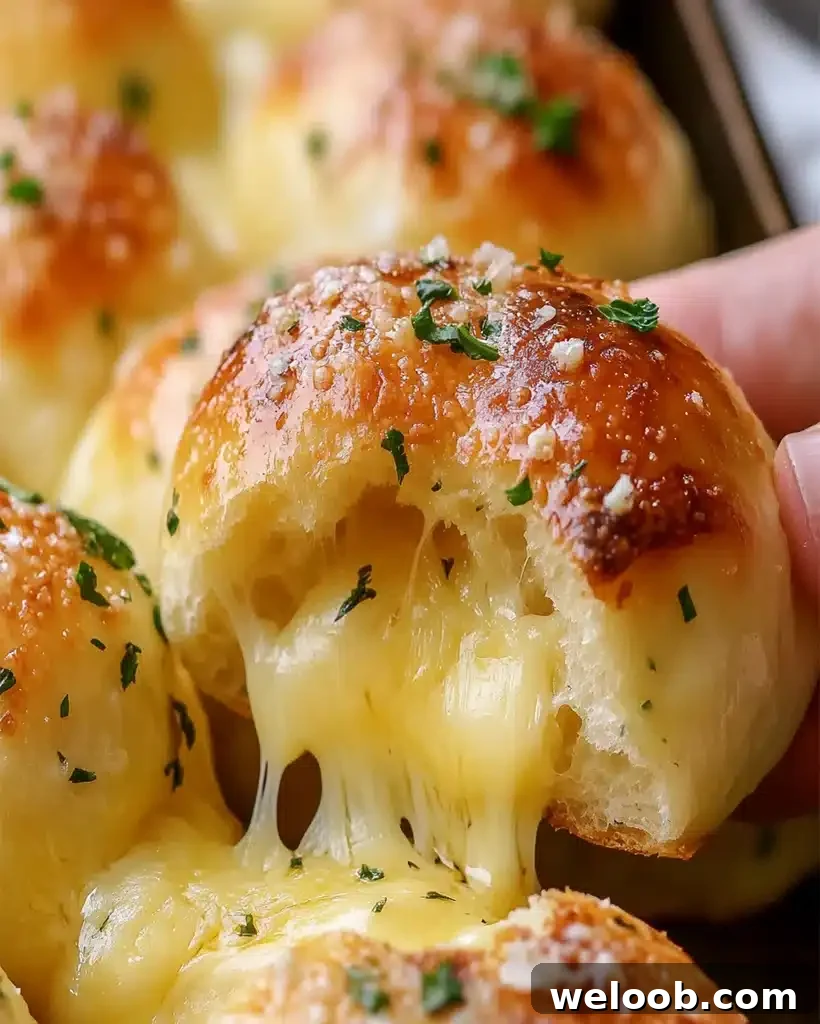
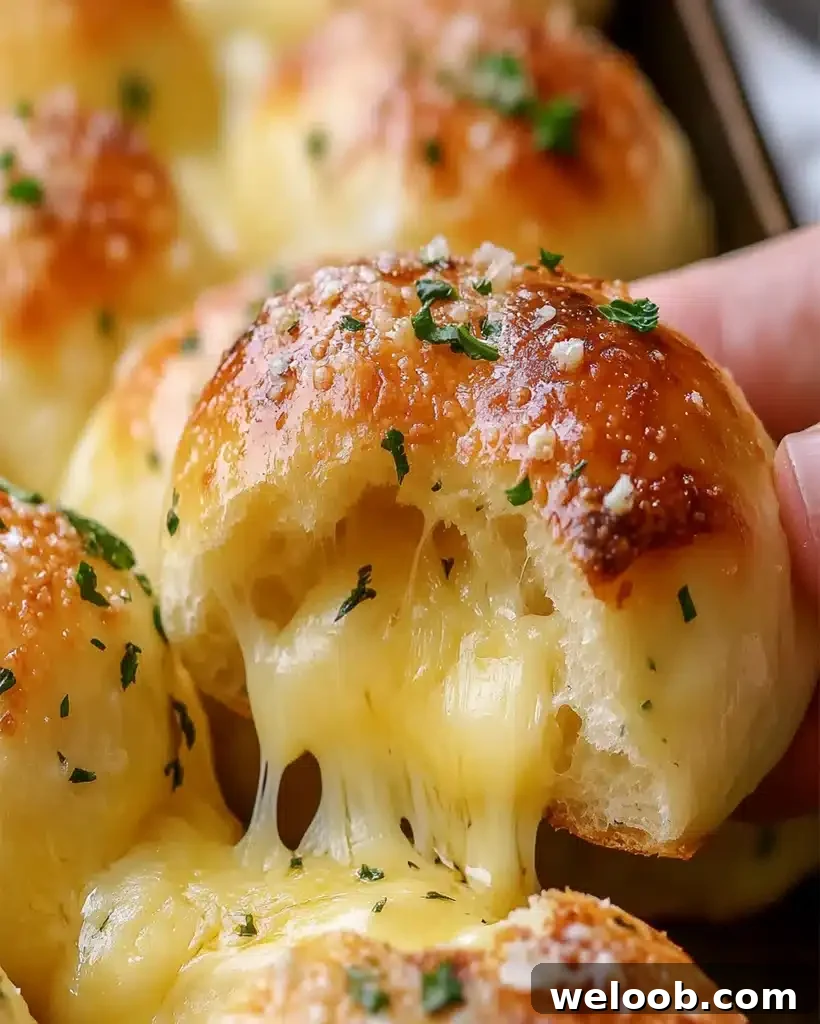
Cheesy Bombs Recipe – Irresistible Cheesy Appetizer Bites
Author: Patri
Introduction: Discover the Delight of Cheesy Bombs
If you love indulgent, cheesy snacks, these Cheesy Bombs are a must-make. They combine a crisp, golden exterior with a molten, gooey cheese center for a bite-sized treat that’s perfect as an appetizer, party snack, or comfort food. This recipe is straightforward, flexible for variations, and ideal for feeding a crowd or enjoying as a quick, satisfying snack.
Ingredients for Making Cheesy Bombs
Here’s What You’ll Need:
- 8 frozen Texas rolls (thawed; Rhodes brand recommended)
- 4 mozzarella sticks, each cut into pieces (about 16 pieces total)
- 4 tablespoons salted butter, melted
- 2 cloves garlic, minced
- 1 tablespoon parsley flakes (fresh or dried)
Optional Additions
- Pepperoni slices or bacon bits for extra savory flavor
- Substitute mozzarella with cheddar or pepper jack for a sharper or spicier bite
Feel free to adjust the fillings and seasonings to suit dietary needs or taste preferences.
How to Make Cheesy Bombs – Step by Step
Step-by-Step Instructions for Perfect Cheesy Bombs
- Thaw: Place the frozen rolls on a plate, cover, and refrigerate for at least 4 hours or overnight to thaw.
- Preheat: Heat your oven to 350°F (175°C). Line a baking sheet with parchment paper.
- Prepare the cheese: Slice mozzarella sticks into roughly 1-inch pieces.
- Shape the dough: Flatten each dough ball with clean hands into a round disk large enough to hold the cheese.
- Fill: Place two small pieces of mozzarella (or your chosen cheese) in the center of each flattened dough disk.
- Seal: Pinch the edges tightly to enclose the cheese, making sure there are no gaps. Place each sealed ball seam-side down on the baking sheet.
- Bake: Bake for about 9–11 minutes, or until the dough turns golden brown.
- Make garlic butter: While baking, melt the butter in a small dish or saucepan and stir in the minced garlic and parsley.
- Brush: When the bombs are browned, remove them from the oven and brush each one generously with the garlic butter.
- Rest: Let the Cheesy Bombs cool briefly so the cheese sets slightly, then serve warm.
Tips for Success
- Seal the edges completely to prevent cheese from leaking while baking.
- Use cold cheese cubes so the dough cooks through before the cheese fully melts.
- If you prefer stronger garlic flavor, add a pinch of garlic powder to the butter mixture or increase the minced garlic.
Helpful Tips and Variations
- Experiment with fillings: Tiny pieces of pepperoni, cooked bacon, or sautéed mushrooms pair well with cheese.
- Serve with dips: Marinara sauce, ranch dressing, or a spicy mayo complement the richness.
- Make ahead: Assemble unbaked bombs and freeze them on a tray. Transfer to a freezer bag and bake from frozen, adding a few extra minutes to the baking time.
Cooking Tips for the Best Cheesy Bombs
- Use cold cheese: Prevents premature leaking and helps dough bake evenly.
- Seal tightly: Pinch and press seams firmly to avoid spillage.
- Brush butter generously: Adds flavor and creates a glossy, golden finish.
Serving Suggestions for Cheesy Bombs
These bites are versatile and crowd-friendly. Serve them as:
- Appetizers: Arrange warm bombs with dipping bowls of marinara or garlic aioli.
- Party snacks: Place in a basket or on a platter and serve while hot.
- Side dish: Pair with soup or salad for a simple meal—try a Caesar salad and a cold lemonade for balance.
Nutritional Information for Cheesy Bombs
These Cheesy Bombs are an indulgent treat. Enjoy them in moderation as part of a balanced diet. They provide protein and calcium thanks to the cheese, but are higher in fat and calories than plain bread rolls.
Nutritional Information (per serving)
- Calories: 120 kcal
- Fats: 8 g
- Carbs: 15 g
- Protein: 5 g
- Vitamins: A, C, and Calcium
For a lighter version, use reduced-fat cheese and replace butter with olive oil or a light spread.
Storage and Leftovers for Cheesy Bombs
How to Store and Reheat
- Refrigerate: Store leftovers in an airtight container in the refrigerator for up to 3 days.
- Reheat: Warm in a 350°F (175°C) oven for 5–7 minutes, or microwave on medium for 20–30 seconds for a quick option.
Freezing
You can freeze baked bombs in a freezer-safe bag for up to 2 months. Reheat them from frozen in the oven until hot throughout.
Frequently Asked Questions (FAQs) for Cheesy Bombs
1. Can I use other types of cheese?
Yes. Cheddar, gouda, or pepper jack work well and offer different flavor profiles.
2. How do I prevent cheese from leaking out?
Make sure the dough seams are fully pinched and pressed together with no gaps.
3. Can I make these ahead of time?
Yes. Assemble them and freeze before baking, or prepare up to the baking step and refrigerate for a short time before baking.
4. What dips pair well with Cheesy Bombs?
Marinara, ranch, garlic aioli, and spicy mayonnaise are all excellent choices.
Related Recipes for Cheese Lovers
If you enjoy Cheesy Bombs, try other crowd-pleasing cheese recipes such as sausage balls, a hearty cowboy casserole, or cheesy stuffed bread. These share similar flavors and appeal to anyone who loves gooey, baked cheese treats.
Conclusion: Try This Cheesy Bombs Recipe Today!
These Cheesy Bombs are easy to prepare, customizable, and guaranteed to be a hit at parties or as a comforting snack. Follow the simple steps above, experiment with fillings and dips, and enjoy a warm, cheesy bite every time. Happy cooking!