
Garlic Parmesan Cheeseburger Bombs Recipe – Party Appetizers
22 min read
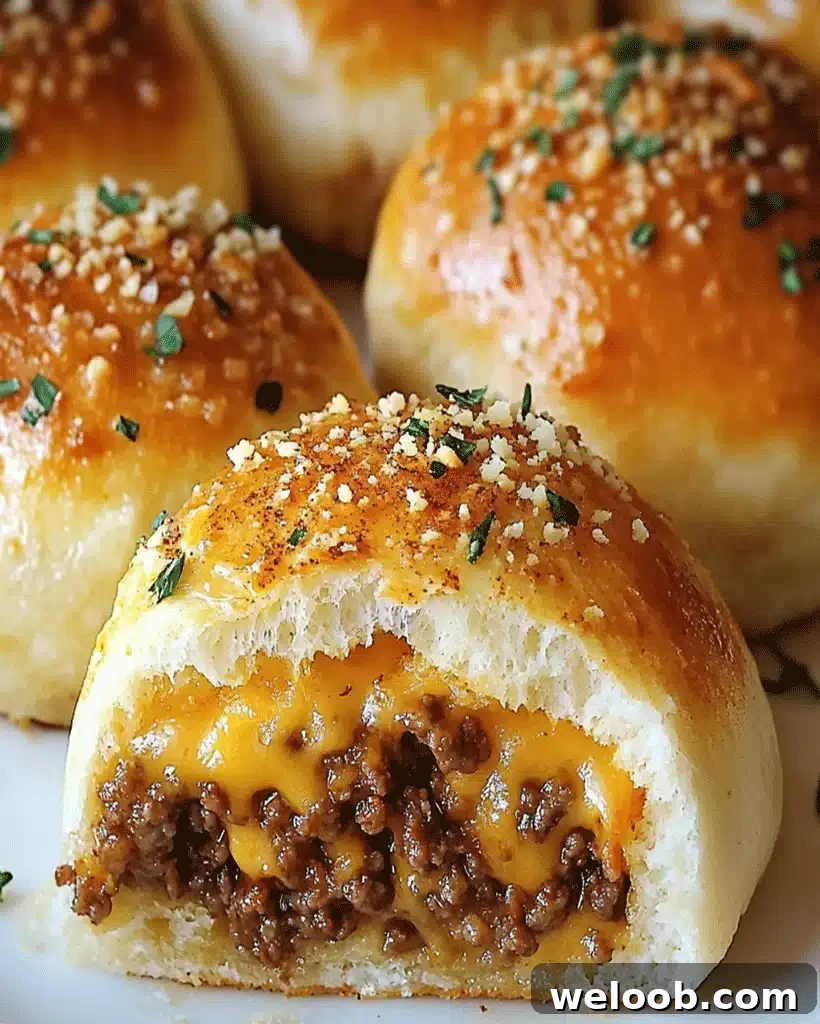
Garlic Parmesan Cheeseburger Bombs are a simple, flavor-packed appetizer that folds seasoned ground beef and melted cheese into golden biscuit dough. Ready in about , this recipe yields eight handheld bites that are ideal for game day, potlucks, or a quick family snack. Prep takes only and baking about . The filling combines lean ground beef, softened cream cheese, shredded cheddar, garlic powder, and onion powder for a creamy, savory center. A brush of melted butter mixed with grated Parmesan creates a crisp, aromatic crust. The recipe uses ten common ingredients and averages about $9.40 per batch (US avg, March 2026), roughly $1.18 per serving.
Quick Steps at a Glance
- Preheat the oven to 375°F (190°C) and line a rimmed baking sheet with parchment paper.
- Brown 1 lb ground beef over medium-high heat for about ; drain any excess fat and stir in garlic powder, onion powder, cream cheese, and shredded cheddar until smooth.
- Flatten each biscuit round to about 4 inches, spoon in a heaping tablespoon of filling, and pinch the dough closed—assembly takes roughly .
- Brush each bomb with melted butter mixed with grated Parmesan and place seam-side down on the baking sheet.
- Bake at 375°F for about until deep golden brown, rest briefly, garnish with parsley, and serve warm.
What Are Garlic Parmesan Cheeseburger Bombs?
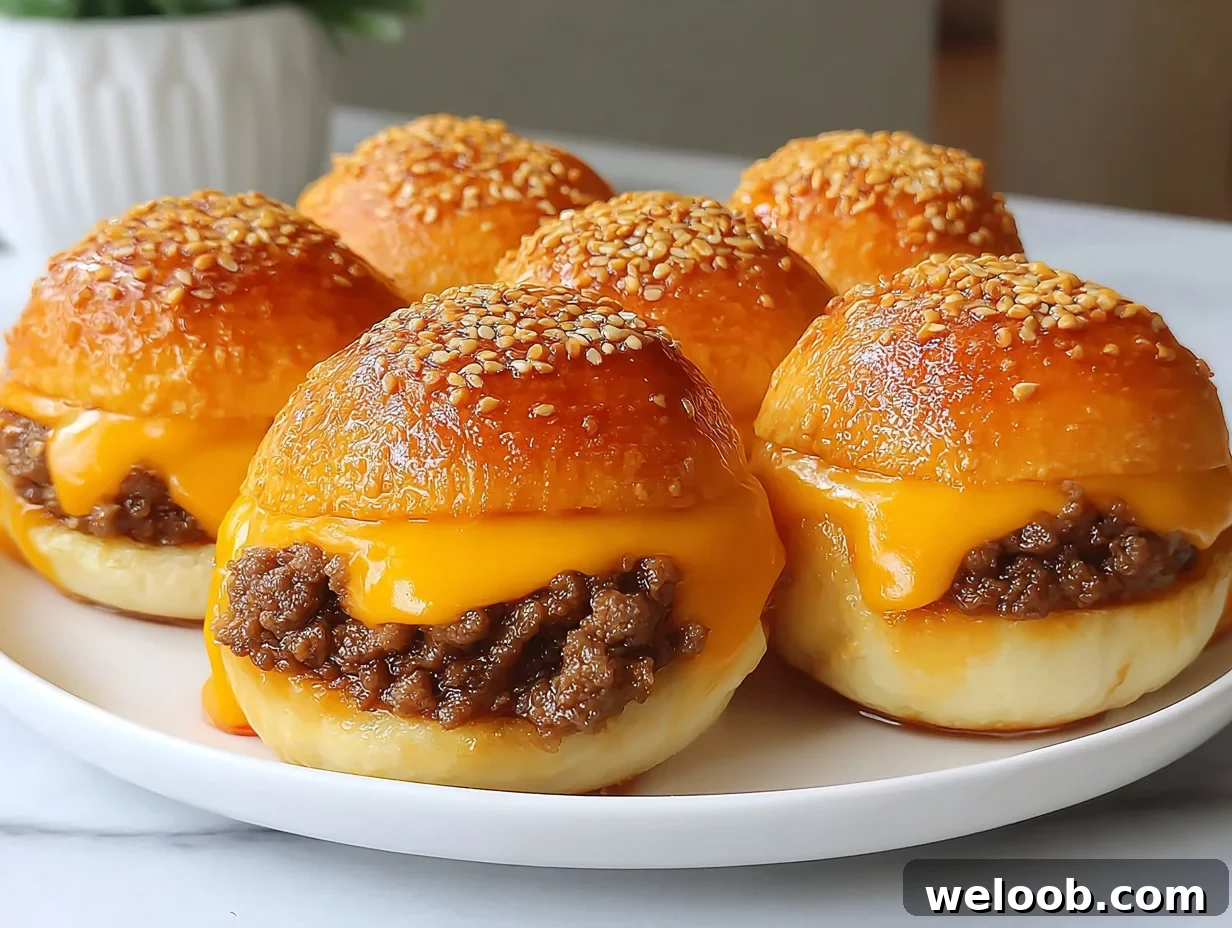
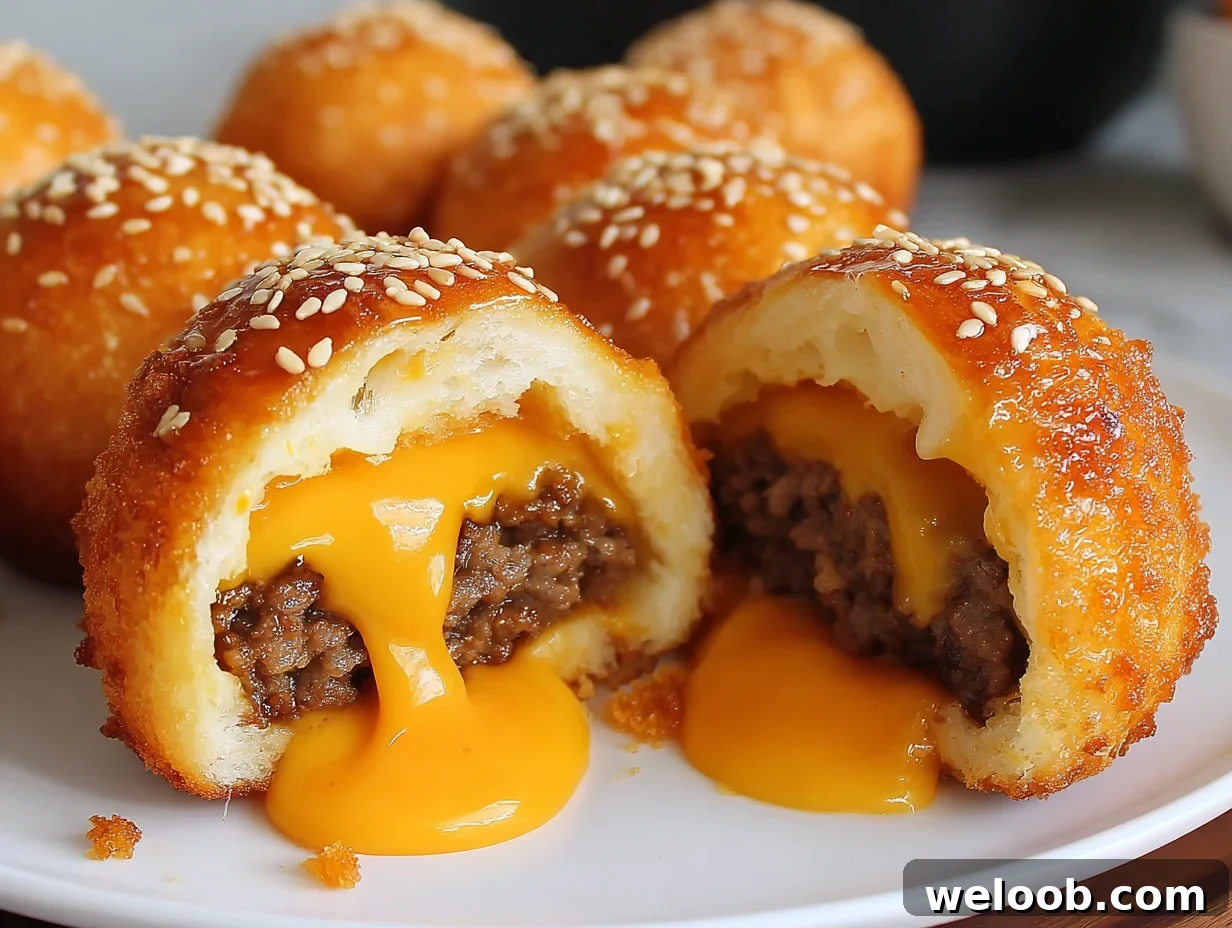
Garlic Parmesan Cheeseburger Bombs are bite-sized stuffed biscuits filled with seasoned ground beef and a blend of cream cheese and cheddar, brushed with a garlic-Parmesan butter for a crisp, flavorful finish. Ready in about and serving eight.
TL;DR
Notes from testing
- Baking at 375°F gives a crisp crust without drying the filling.
- Drain excess beef fat before adding cream cheese to avoid soggy bottoms.
- Flatten biscuits to about 4 inches for the best dough-to-filling ratio.
- Allow assembled bombs to rest briefly before baking so seams seal and stay closed.
Cook’s Note: Pinching seams firmly and placing bombs seam-side down prevents leaks. These have become a favorite for family nights—easy, kid-friendly, and quick to disappear from the platter.
Highlights: a creamy dual-cheese filling, a garlic-Parmesan brushed crust, and convenient make-ahead or freezer options. Baked leftovers keep in the refrigerator for up to , and unbaked assembled bombs freeze well for up to .
Why This Version Stands Out
This version combines cream cheese with shredded cheddar so the filling stays cohesive and creamy rather than separating into greasy pockets. Brushing the bombs with a butter-Parmesan mix before baking helps the cheese bake into the surface for an extra-crisp, savory crust that elevates ordinary biscuit dough into something special.
Key Takeaways
- ⏱️ Fast to make: about from start to finish.
- 🧀 Double-cheese filling: cream cheese + cheddar creates a gooey, stable center.
- ❄️ Freezer-friendly: assemble ahead and bake from frozen when needed.
- 💰 Budget-smart: roughly $1.18 per serving (US avg, March 2026).
Why You’ll Love This Recipe
- Creamy, melty filling: The cream cheese-cheddar combo melts into the beef for a rich, gooey center that holds together.
- Crunchy, savory crust: A brush of butter and grated Parmesan forms a golden, umami-rich exterior.
- Simple ingredients: Uses pantry staples and a can of biscuit dough—no specialty shopping required.
- Handheld and shareable: Perfect finger food for parties and casual gatherings.
- Kid-friendly: Mild seasoning and familiar cheeseburger flavor appeal to picky eaters.
- Flexible: Easy swaps for ground turkey, dairy-free cheeses, or gluten-free biscuit dough.
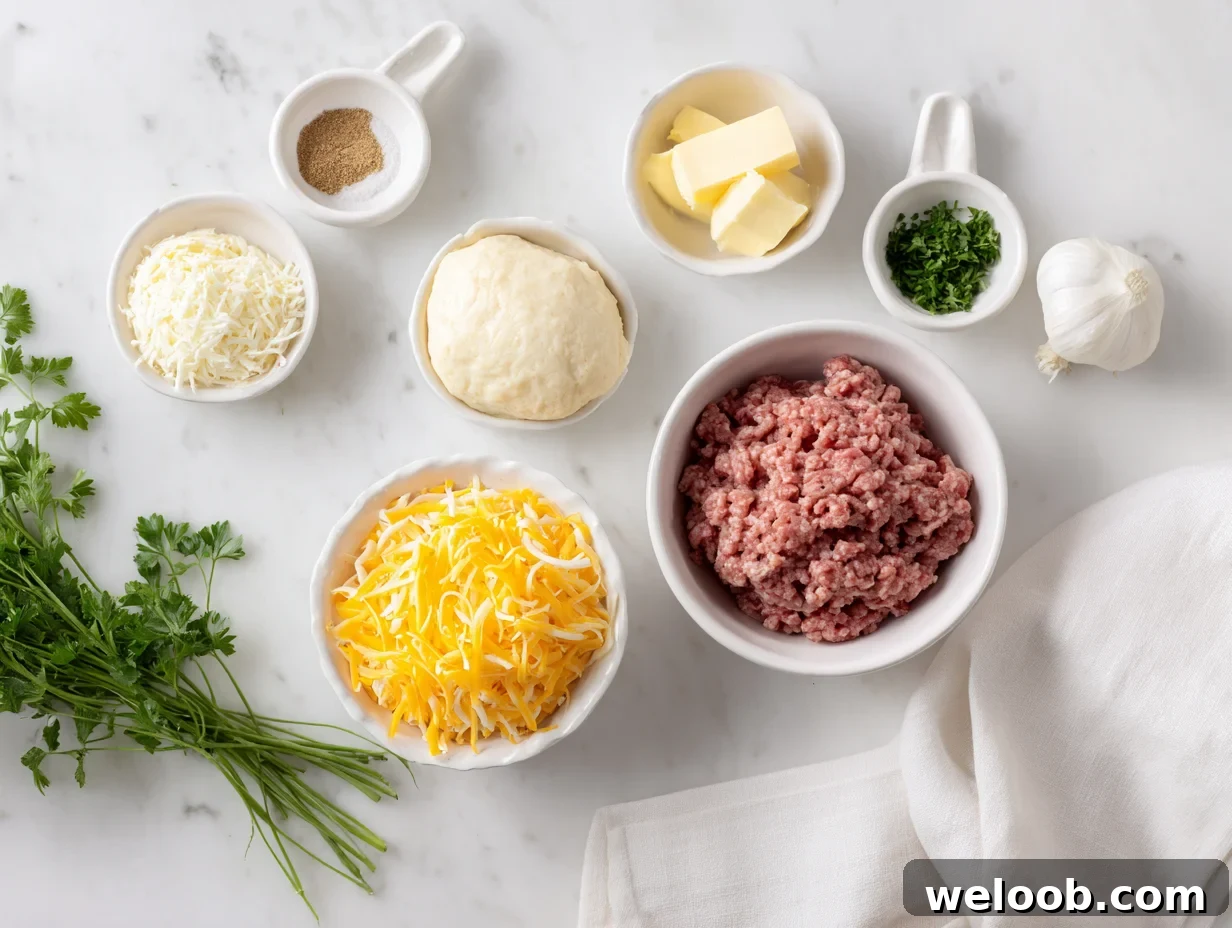
Ingredient Deep Dive
Ingredients at a Glance
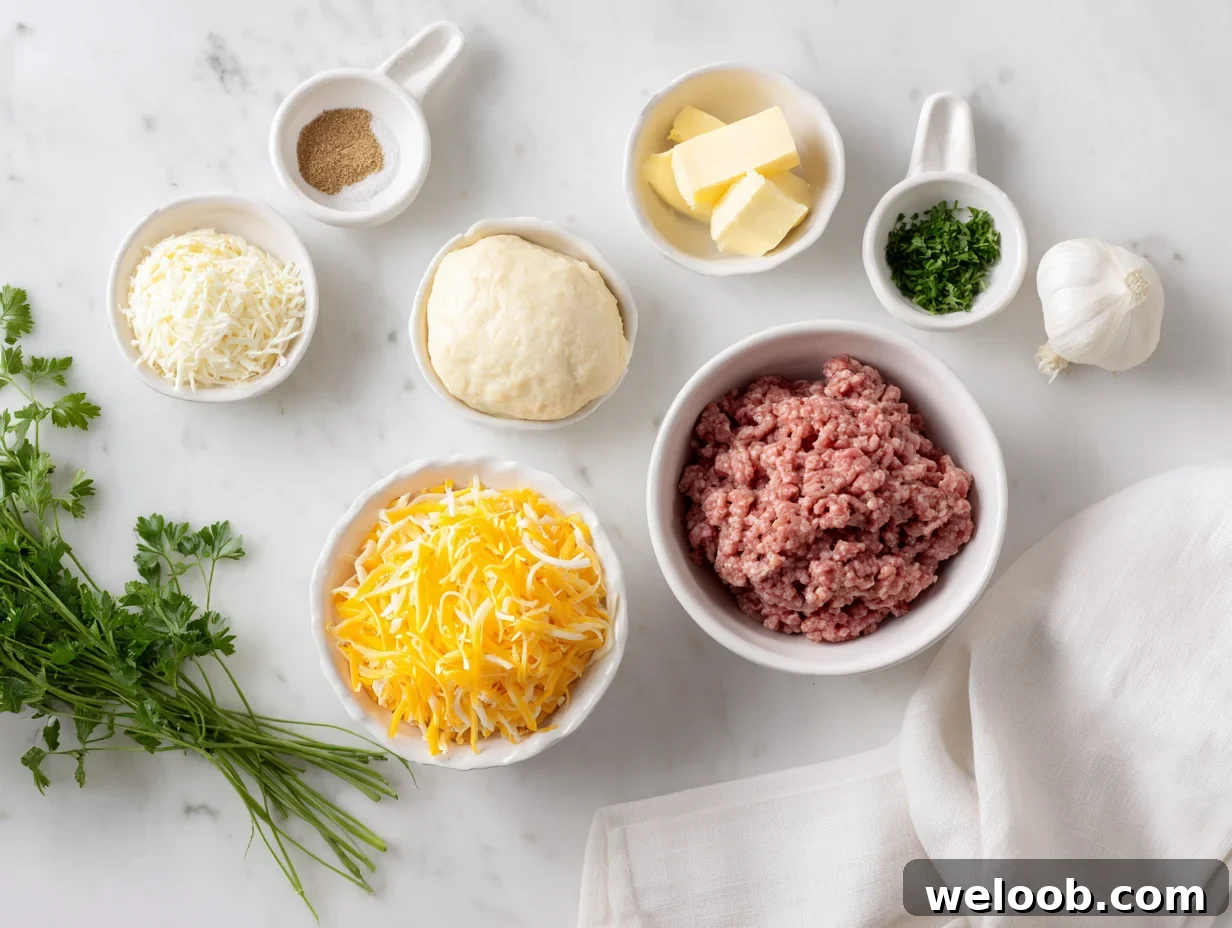
Equipment You Need
- Large non-stick skillet — for browning the beef evenly.
- Rimmed baking sheet — keeps the oven clean and fits a full batch.
- Pastry brush — to apply the butter-Parmesan glaze evenly.
- Wooden spoon or spatula — for breaking up and stirring the beef.
- Parchment paper or silicone mat — for easy release and crisp bottoms.
- Instant-read thermometer (optional) — to check beef temperature for safety.
Equipment Alternatives
| Tool | Best Option | Alternative | Notes |
|---|---|---|---|
| Large Skillet | 12-inch non-stick skillet | Cast-iron skillet | Cast iron gives excellent browning; use it if you prefer deeper caramelization. |
| Pastry Brush | Silicone pastry brush | Back of a spoon | Use a spoon to drizzle and spread the butter-Parmesan mix if you don’t have a brush. |
| Parchment Paper | Unbleached parchment | Silicone baking mat | Both prevent sticking and improve browning. |
| Rolling Pin | Small rolling pin | Your palms or a glass | Flatten biscuits with your hands or a glass if you don’t have a rolling pin. |
Step-by-Step Guide
This recipe is beginner-friendly and breaks down into straightforward stages: cook and season the beef, fold in cheeses, fill and seal biscuit rounds, brush with Parmesan butter, and bake until golden. Plan for about total.
Season & Fill
Brown and season the beef. Heat a large skillet over medium-high and cook the ground beef for about , breaking it apart as it browns. Drain excess fat, then stir in garlic powder, onion powder, salt, and pepper. The beef should be evenly browned and well seasoned.
Make the creamy filling. Lower the heat to medium-low and add the softened cream cheese, stirring until it melts into the meat. Mix in the shredded cheddar until fully combined and glossy. Remove from heat and let the filling cool for about so it’s easier to handle.
Wrap & Bake
Preheat and prepare dough. Preheat the oven to 375°F (190°C) and line a rimmed baking sheet. Separate the biscuit rounds and flatten each to about 4 inches across on a lightly floured surface.
Fill and seal the bombs. Place roughly 1 heaping tablespoon of cooled filling in each disc, leaving a 1/2-inch border. Pinch the edges firmly to seal and roll into a smooth ball. Place each bomb seam-side down on the prepared sheet, spacing them at least 2 inches apart.
Brush with Parmesan butter and bake. Stir melted butter with grated Parmesan, then brush the mixture over each bomb. Bake in the preheated oven for about until deeply golden. Rotate the pan if necessary for even browning.
Rest & Serve
Rest briefly and garnish. Let the bombs cool on the pan for about to let the filling set. Garnish with chopped parsley and serve with favorite dips like ketchup, mustard, or ranch.
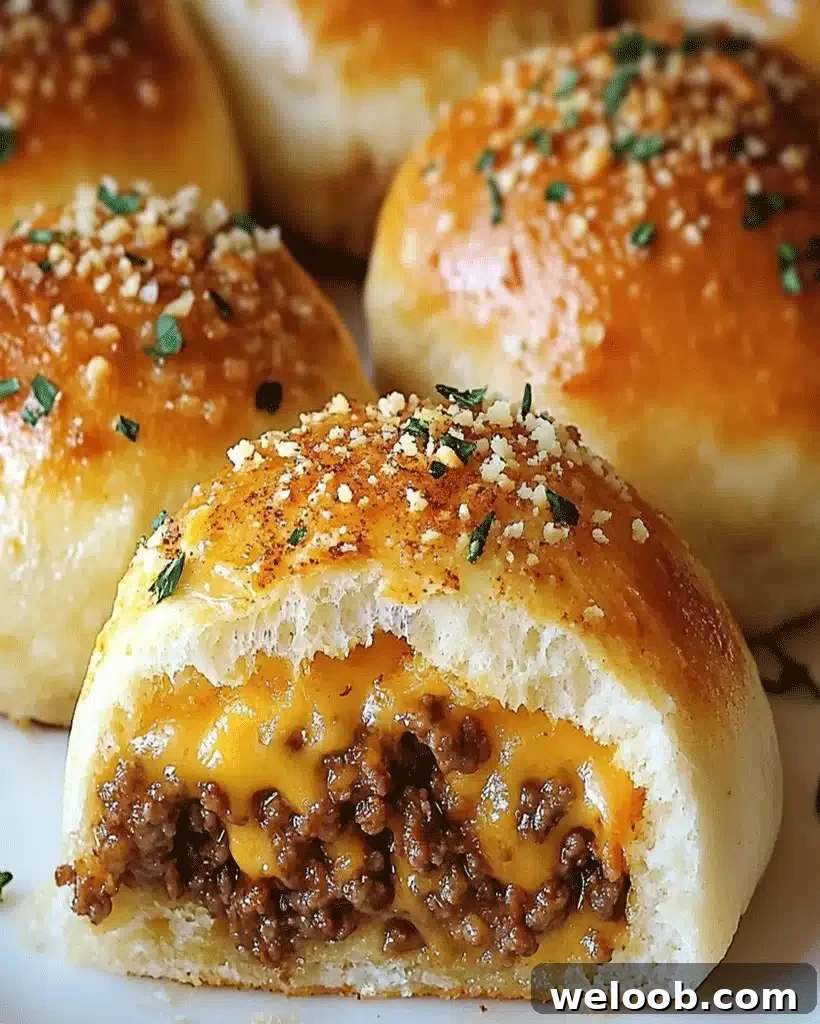
Garlic Parmesan Cheeseburger Bombs – Easy Snack Recipe
5 Stars
No reviews
- Author: Patricia
Description
These Garlic Parmesan Cheeseburger Bombs combine familiar cheeseburger flavors into a convenient, oven-baked bite. Juicy seasoned beef, silky cream cheese, and melty cheddar get tucked into a soft biscuit shell and finish with a buttery, Parmesan crust. They’re easy to make, friendly for crowds, and customizable to suit dietary needs.
Ingredients
Scale
- 1 lb ground beef: Lean beef works best for a less greasy filling.
- 1 cup shredded cheddar cheese: Provides a gooey, melty texture.
- 1/2 cup cream cheese, softened: Adds creaminess and richness.
- 1 tsp garlic powder: Enhances the savory flavor.
- 1 tsp onion powder: Adds depth to the beef mixture.
- Salt and pepper, to taste: Essential seasonings for the perfect flavor.
- 1 can (16 oz) refrigerated biscuit dough: The base for your cheeseburger bombs.
- 1/4 cup grated Parmesan cheese: For that crispy, cheesy topping.
- 2 tbsp butter, melted: To brush over the tops for a golden finish.
- Fresh parsley, chopped (optional): For garnish and added color.
Optional Substitutions:
- Swap ground beef with ground turkey for a leaner option.
- Use dairy-free cream cheese and cheddar for a lactose-free alternative.
- Try gluten-free biscuit dough if needed.
Instructions
Step 1: Prepare the Filling
- Preheat your oven to 375°F (190°C) and line a baking sheet with parchment paper.
- In a skillet over medium heat, cook the ground beef until browned and no longer pink. Drain excess grease.
- Stir in garlic powder, onion powder, salt, and pepper; taste and adjust seasoning.
- Add the cream cheese and shredded cheddar, stirring until fully melted and combined. Set aside to cool slightly.
Step 2: Assemble the Bombs
- Open the biscuit dough and separate into individual pieces.
- Flatten each biscuit into a circle about 4 inches wide.
- Place a spoonful (about 1 heaping tablespoon) of the beef-cheese mixture in the center of each circle.
- Pull the dough up and pinch the edges tightly to seal. Roll into a smooth ball and place seam-side down on the baking sheet.
Step 3: Add Garlic Parmesan Topping
- Mix the melted butter with grated Parmesan.
- Brush the mixture over the tops and sides of each bomb.
Step 4: Bake to Perfection
- Bake for 12–20 minutes, until the tops are deeply golden and the bottoms sound slightly hollow when tapped.
Step 5: Garnish and Serve
- Let the bombs cool for about before serving.
- Sprinkle with chopped parsley for color and serve warm with your favorite dips.
Notes
- Use fresh cheese: Grating your own cheddar melts better than pre-shredded varieties.
- Seal well: Pinch seams tightly and place bombs seam-side down to prevent leaks.
- Don’t overfill: Keep filling portions uniform to avoid bursting during baking.
- Customize: Add jalapeño, bacon, or caramelized onions for extra flavor.
Below you’ll find helpful ideas for variations, cost breakdowns, storage tips, and serving suggestions to make these bombs fit any occasion.
Variations & Substitutions
See all substitutions and variations
Variation Comparison
| Category | Standard | Best Substitution | Result |
|---|---|---|---|
| Protein Swap | Ground beef | Ground turkey | Leaner bombs with milder flavor; add a pinch more seasoning. |
| Dairy-Free | Cream cheese + cheddar | Dairy-free cream cheese and cheddar shreds | Lactose-free option with a slightly firmer filling when cooled. |
| Gluten-Free | Refrigerated biscuit dough | Gluten-free biscuit dough | Denser shell but great for celiac-friendly needs. |
| Cheese Upgrade | Cheddar | Pepper jack or smoked gouda | Pepper jack adds heat; smoked gouda adds depth. |
| Spicy Kick | Salt & pepper | Add smoked paprika + cayenne | A smoky, slightly spicy version that pairs well with cool dips. |
Cost & Value: What This Actually Costs
| Ingredient | Approximate Cost |
|---|---|
| Ground beef (1 lb) | $3.50 |
| Shredded cheddar (1 cup) | $1.00 |
| Cream cheese (1/2 cup) | $0.90 |
| Spices and pantry items | $0.25 |
| Refrigerated biscuit dough (16 oz) | $2.25 |
| Parmesan (1/4 cup) | $0.60 |
| Butter (2 tbsp) | $0.25 |
| Parsley (optional) | $0.15 |
| TOTAL | ~$9.40 (8 servings ≈ $1.18/serving) |
At about $1.18 per serving (US avg, March 2026), these are an economical choice for feeding a crowd and much cheaper than many restaurant or frozen alternatives.
Meal Prep & Make-Ahead Guide
These bombs are ideal for make-ahead planning. Cook the filling in advance, assemble and freeze unbaked bombs, or bake ahead and reheat as needed.
- Make a double batch of filling and refrigerate for up to .
- For freezer storage, flash-freeze assembled bombs, transfer to a labeled bag, and store up to . Bake from frozen with a few extra minutes in the oven.
- Baked bombs reheat well in a 350°F oven, air fryer, or microwave for quick lunches or snacks.
What to Serve With Garlic Parmesan Cheeseburger Bombs
Pair these bites with lighter sides to balance richness: crisp salads, pickles, a cool ranch dip, or oven-baked sweet potato fries all work well.
- Dill pickles or pickled chips — add a bright, acidic contrast.
- Cool ranch or Greek yogurt dip — balances the savory crust.
- Simple green salad — keeps the meal fresh and balanced.
- Sweet potato fries or coleslaw — offer contrasting textures and flavors.
Storage & Reheating Guide
Follow these tips to keep bombs tasting their best.
Storage Quick Reference
| Method | Container | Duration |
|---|---|---|
| Fridge (baked) | Airtight container | Up to 3 days |
| Freezer (unbaked) | Freezer bag | Up to 2 months |
| Freezer (baked) | Freezer bag | Up to 2 months |
- Oven: Reheat at 350°F for 10–18 minutes depending on whether refrigerated or frozen.
- Air fryer: Reheat at 325°F for 5–8 minutes for a crisp exterior.
- Microwave: Microwave briefly (45–75 seconds) for a quick warm-up; the crust will be softer.
Expert Pro Tips for the Best Results
Small details make a big difference—follow these tips for consistent results.
- Chill the filling briefly before scooping to make assembly easier.
- Flatten each biscuit evenly to about 4 inches to prevent thin spots that can burst.
- Seal seams tightly and place bombs seam-side down for fewer leaks.
- Use a cookie scoop for uniform filling portions.
- Brush butter and Parmesan immediately before baking so it adheres well.
- Leave space between bombs on the pan for even browning.
Troubleshooting Common Issues
| Problem | Cause | Fix |
|---|---|---|
| Cheese leaks | Loose seams or overfilling | Use smaller portions of filling and pinch seams firmly; place seam-side down. |
| Gummy interior | Oven too hot or uneven sizing | Confirm oven temperature and keep bomb sizes consistent. |
| Dry bombs | Over-baking or too-lean beef | Do not over-bake and keep the cream cheese amount to retain moisture. |
Frequently Asked Questions
Answers to common questions about making these at home.
Can I make these ahead of time?
Yes. Assemble the bombs and refrigerate for up to one day, or flash-freeze on a sheet pan and transfer to a freezer bag for up to . Bake from frozen with a few extra minutes.
What sauces pair well?
Ketchup, mustard, and ranch are classics. For variety, try sriracha mayo, pickle aioli, or a smoky chipotle yogurt dip.
How do I prevent them from bursting?
Don’t overfill; use about 1 heaping tablespoon of filling per biscuit. Pinch seams tightly and let assembled bombs rest briefly in the fridge before baking.
Can I use different cheeses?
Yes. Mozzarella, pepper jack, Colby jack, or smoked gouda all work—grate them fresh for the best melt.
More Easy Appetizers Recipes
If you enjoyed these bombs, try other savory, crowd-pleasing appetizers from the same collection to build a full spread.
- Parmesan Zucchini Potato Muffins
- Pineapple Brown Sugar Lil’ Smokies Bites
- Beet Citrus Salad
Final Thoughts
Garlic Parmesan Cheeseburger Bombs are an easy, crowd-pleasing appetizer that bring cheeseburger flavor into a neat, handheld package. They’re quick to make, budget-friendly, and adaptable to many dietary needs. Whether you bake them fresh or keep a stash in the freezer, they’re a reliable go-to for entertaining or a satisfying family snack.

Original Photos
Patricia Jannet is co-founder of OptimalRecipes, where she develops and tests home-friendly recipes focused on reliable results and clear instructions. Every recipe is tested multiple times to ensure consistency in typical home kitchens.
Nutritional data referenced from USDA FoodData Central where indicated. Ingredient guidance follows standard culinary practices for stuffed biscuit appetizers.
Sources & References
- USDA FoodData Central — nutritional data reference.
- FDA and USDA safe food handling guidelines — for temperature and storage recommendations.
Recipe testing was done in a standard home kitchen. Use an instant-read thermometer to confirm safe internal temperatures when in doubt.
— Patricia Jannet, Recipe Developer at Optimal Recipes |