
Hocus Pocus Witch’s Brew Cookies Recipe for Halloween
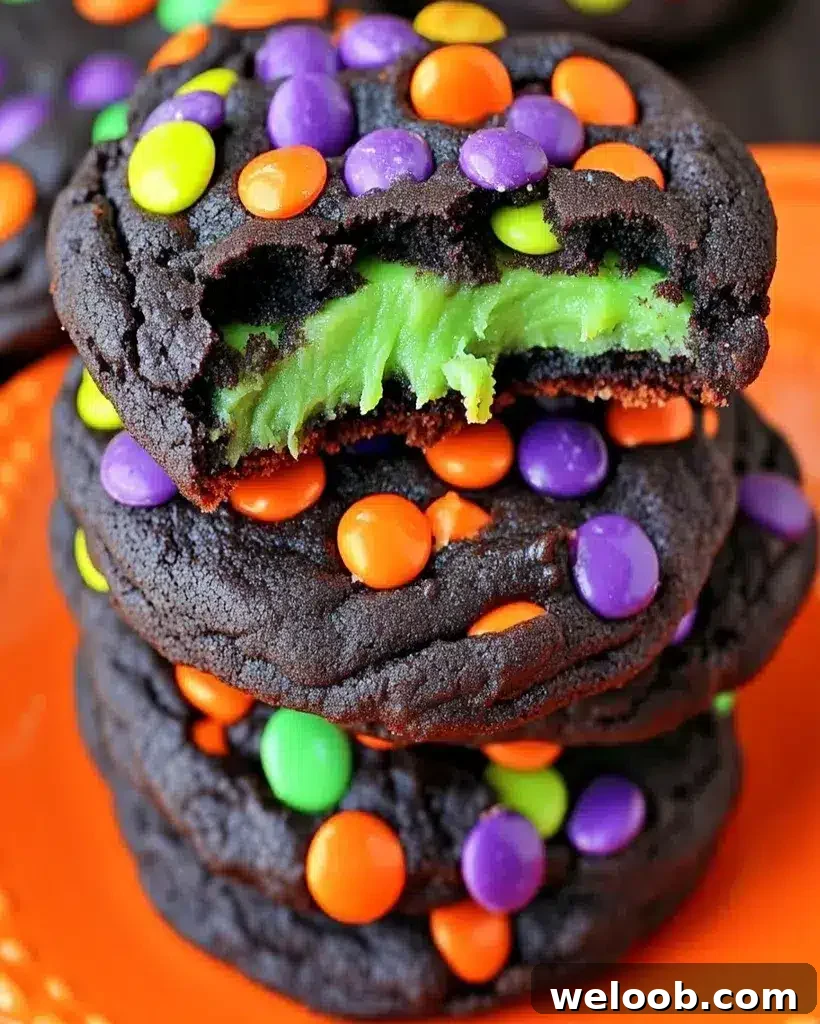

Witch’s Brew Cookies Recipe | Fun Hocus Pocus Halloween Treats
Author: Patricia
Description
Welcome to a playful and spooky cookie recipe for the season: Witch’s Brew Cookies, also called Hocus Pocus Halloween Cookies. These chocolate cookies are studded with green, orange, and purple candy-coated chocolates and finished with a neon green filling for a dramatic, festive look. They’re easy enough to make with kids, ideal for a Halloween party spread, and delightfully indulgent for anyone who loves themed baking.
Introduction
These cookies are inspired by bubbling cauldrons and the colorful palette of Halloween. The base is a rich chocolate cookie with a soft, chewy texture. Pops of candy-coated chocolate provide seasonal color, while a bright green filling adds a surprising center. The recipe is flexible: you can adapt ingredients for dietary needs and experiment with other colors to suit different celebrations.
Ingredients for Witch’s Brew Cookies
Everything you need to make a batch. Quantities are for a single batch; scale up as needed.
- 1 ½ cups all-purpose flour
- ½ cup unsweetened cocoa powder
- 1 teaspoon baking soda
- ¼ teaspoon salt
- ½ cup unsalted butter, softened
- ¾ cup granulated sugar
- 1 large egg
- 1 teaspoon vanilla extract
- ¼ cup milk
- ½ cup candy-coated chocolates in green, orange, and purple
- ½ cup neon green filling (optional) — green-tinted white chocolate ganache or green frosting works well
Optional substitutions:
- Use a 1:1 gluten-free flour blend for a gluten-free version.
- Swap plant-based butter and almond milk for dairy-free baking.
How to Make Witch’s Brew Cookies — Step by Step
Step 1: Preheat the oven
Preheat to 350°F (175°C). Line a baking sheet with parchment paper so cookies bake evenly and won’t stick.
Step 2: Combine dry ingredients
In a medium bowl, whisk together the flour, cocoa powder, baking soda, and salt. Set aside.
Step 3: Cream butter and sugar
In a separate bowl, cream the softened butter and granulated sugar with a mixer or by hand until light and fluffy, about 3–4 minutes. This creates a softer, chewier texture.
Step 4: Add egg and vanilla
Beat in the egg and vanilla until fully combined.
Step 5: Combine wet and dry
Slowly add the dry mixture to the wet ingredients, alternating with the milk. Mix until a soft dough forms. Avoid overmixing to keep the cookies tender.
Step 6: Fold in candies
Gently fold in the candy-coated chocolates to distribute color throughout the dough.
Step 7: Shape and add green filling
Scoop dough balls about 2 tablespoons each and place on the prepared sheet. Use your thumb to make a shallow indentation in each ball and add a small dollop of neon green filling.
Step 8: Top with extra candies
Press a few extra candy pieces on top of each cookie for a festive finish.
Step 9: Bake and cool
Bake for 10–12 minutes, or until the edges are set but the centers remain slightly soft. Let the cookies cool on the baking sheet for a few minutes, then transfer to a wire rack to cool completely.
Helpful Tips
- Chill the dough: For thicker cookies, chill the dough for 30 minutes before baking to reduce spreading.
- Substitute filling: If you don’t have neon filling, tint melted white chocolate or store-bought frosting with green food coloring.
- Room temperature ingredients: Use room-temperature butter and egg for even mixing and a smooth dough.
- Watch baking time: Remove cookies when centers are still soft to avoid dry results — they’ll firm up as they cool.
- Measure flour correctly: Spoon flour into the measuring cup and level with a knife to prevent dense cookies.
- Baking sheets: Use a light-colored baking sheet to avoid over-browning on the bottom.
Serving Suggestions
Serve these Halloween cookies on a themed dessert table or package them as gifts in clear cellophane tied with orange and black ribbon. They pair well with hot chocolate, pumpkin spice lattes, or a seasonal punch. For variety, try pairing them with spider web cupcakes or candy corn bark for a festive spread.
Nutritional Information
Per serving (1 cookie):
- Calories: 150
- Total Fat: 7g
- Saturated Fat: 4g
- Carbohydrates: 20g
- Sugars: 14g
- Protein: 2g
Enjoy in moderation as part of a balanced diet.
Storage and Make-Ahead
Store cooled cookies in an airtight container at room temperature for up to 5 days. To freeze dough, portion into balls and freeze on a tray until solid; transfer to a freezer-safe bag and freeze up to 3 months. Bake from frozen, adding 1–2 minutes to the baking time. Reheat individual cookies in the microwave for 10–15 seconds for a fresh-baked feel.
Frequently Asked Questions (FAQs)
1. Can I make these cookies gluten-free?
Yes. Replace the all-purpose flour with a 1:1 gluten-free baking flour blend and verify other ingredients, like candies, are gluten-free.
2. What can I use instead of butter?
For a dairy-free option, use a dairy-free butter alternative or coconut oil, and swap milk for a plant-based milk.
3. Can I prepare the dough ahead of time?
Absolutely. Refrigerate the dough for up to 48 hours or freeze for longer storage as described above.
4. Can I change the candy colors?
Yes—choose any colors to match another holiday or theme. Red and white work well for winter holidays; pastel candies suit spring events.
Related Recipe Ideas
If you enjoy Witch’s Brew Cookies, try other festive treats such as Halloween swirl sugar cookies, pumpkin spice cake with cream cheese frosting, or candy corn bark. These also make great additions to a seasonal dessert table.
Conclusion
Witch’s Brew Cookies are a fun, easy, and visually striking treat for Halloween. With a rich chocolate base, colorful candy accents, and a burst of neon green filling, they bring both flavor and festive flair to any celebration. Try the recipe as written or adapt it to suit dietary needs and color themes. Happy baking—and enjoy a little magic this Halloween!