
Marbled Coffee-Chocolate Cream Cheese Cookies
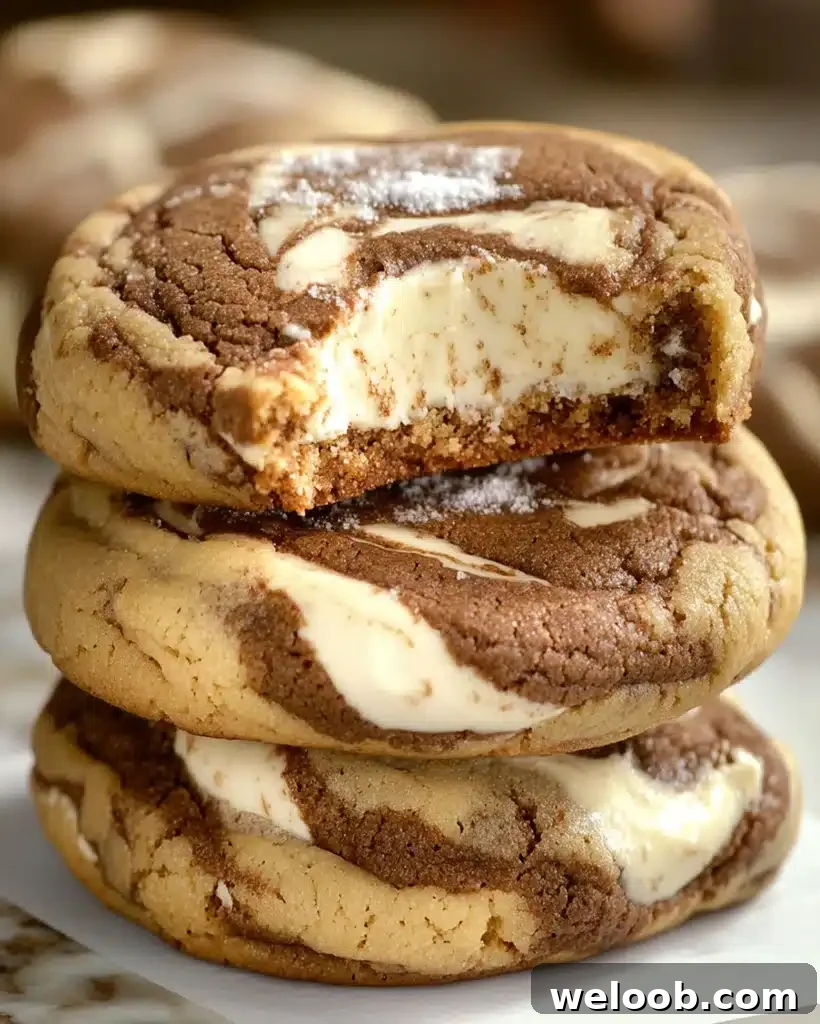
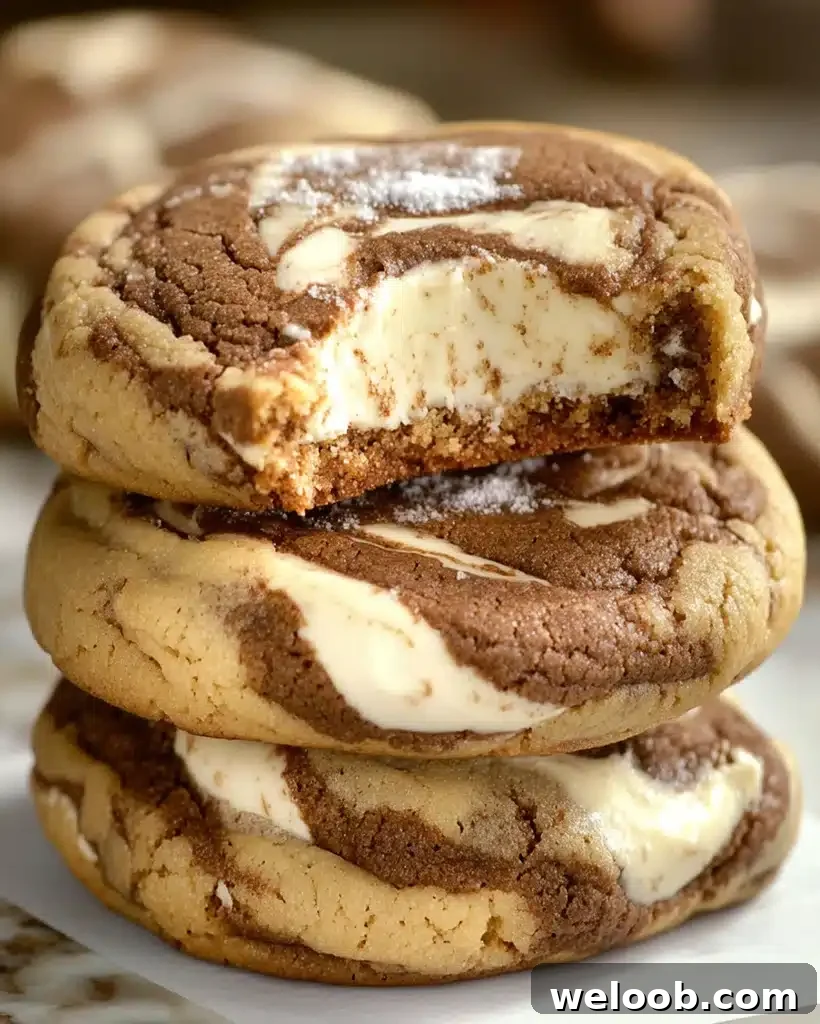
Coffee Swirled Marbled Chocolate Cream Cheese Cookies
Author: Patricia
These Coffee Swirled Marbled Chocolate Cream Cheese Cookies combine the deep, aromatic notes of coffee with bittersweet chocolate and a soft, tangy cream cheese center. The marbled dough creates a striking presentation while the cream cheese filling adds a silky contrast to the cookie’s tender crumb. Whether you want an elegant dessert for guests or an indulgent snack with your afternoon coffee, this recipe is straightforward and rewarding.
Introduction
This recipe pairs cocoa and instant coffee in one half of the dough and leaves the other half plain, so you can create a beautiful marbled pattern by gently combining the two. A small dollop of sweetened cream cheese in the center melts slightly as the cookies bake, giving each bite a creamy, rich middle. The cookies bake up soft at the center with slightly crisp edges—perfect for serving with coffee or tea.
Ingredients for Coffee Swirled Marbled Chocolate Cream Cheese Cookies
For the cookies:
- 1 ½ cups all-purpose flour
- ½ cup unsalted butter, softened
- ½ cup granulated sugar
- ½ cup light brown sugar
- 1 large egg
- 1 teaspoon vanilla extract
- ½ teaspoon baking soda
- ¼ teaspoon salt
- ½ cup cocoa powder
- 1 tablespoon instant coffee powder
For the cream cheese filling:
- 4 oz cream cheese, softened
- ¼ cup powdered sugar
- 1 teaspoon vanilla extract
Optional substitutions:
- For gluten-free cookies, replace the all-purpose flour with a gluten-free baking flour blend (1:1).
- Use a dairy-free cream cheese alternative to make the filling dairy-free.
How to Make Coffee Swirled Marbled Chocolate Cream Cheese Cookies – Step by Step
Step 1: Preheat and prepare
Preheat the oven to 350°F (175°C). Line a baking sheet with parchment paper or use a silicone baking mat to prevent sticking and ensure even baking.
Step 2: Cream butter and sugars
In a large mixing bowl, beat together the softened butter, granulated sugar, and light brown sugar until the mixture is light and fluffy, about 2–3 minutes with an electric mixer.
Step 3: Add egg and vanilla
Mix in the egg and vanilla extract until fully incorporated and the batter is smooth.
Step 4: Combine dry ingredients
In a separate bowl, whisk together the all-purpose flour, baking soda, and salt. Gradually add the dry ingredients to the wet ingredients, mixing just until the dough comes together.
Step 5: Divide and flavor the dough
Divide the dough into two equal portions. To one half, fold in the cocoa powder and instant coffee powder until fully blended. Keep the plain half unflavored.
Step 6: Prepare the cream cheese filling
Beat the softened cream cheese with the powdered sugar and vanilla extract until smooth and creamy. Chill the filling briefly if it seems too soft to handle.
Step 7: Assemble the cookies
Tear off small pieces from each dough, about 1 tablespoon each. Flatten a plain dough piece and a chocolate-coffee dough piece slightly. Place a small spoonful of the cream cheese filling on one piece, then sandwich with the other piece. Gently press and twist to create a marbled pattern without overmixing—this preserves the contrast between the two doughs.
Step 8: Bake
Arrange the assembled cookies on the prepared baking sheet, spacing them 2 inches apart. Bake 10–12 minutes, or until the edges are set and beginning to turn golden while the centers remain slightly soft. Avoid overbaking to keep the cookies tender.
Step 9: Cool
Allow the cookies to cool on the baking sheet for about 5 minutes, then transfer to a wire rack to cool completely. The centers will firm up as they cool.
Helpful Tips
- Quality ingredients: Use good-quality cocoa powder for a richer chocolate flavor that balances the coffee notes.
- Instant coffee: Use a fine instant coffee powder so it blends smoothly into the dough. If needed, pulse it in a spice grinder for a finer texture.
- Chill if needed: If the dough becomes too soft while you work, chill both doughs for 10–15 minutes to make handling easier and to preserve the marbled effect.
- Marbling technique: Gently swirl the two doughs together—overmixing will blend them into a single color instead of a marbled pattern.
Serving Suggestions
These cookies are excellent with hot coffee, espresso, or a latte to echo the coffee flavor in the dough. For a dessert twist, serve warm with a scoop of vanilla or coffee ice cream. They are great for brunch spreads, coffee breaks, or gift boxes.
Nutritional Information (estimated per cookie)
- Calories: 180 kcal
- Total fat: 9 g
- Saturated fat: 5 g
- Carbohydrates: 22 g
- Sugars: 14 g
- Protein: 2 g
- Fiber: 1 g
- Sodium: 100 mg
Storage and Leftovers
Store cooled cookies in an airtight container at room temperature for up to 3 days. For longer storage, refrigerate up to one week or freeze in an airtight container for up to 3 months. To refresh chilled or frozen cookies, warm briefly in a preheated oven for a few minutes or microwave for 10–15 seconds.
Frequently Asked Questions
- Can I use decaf coffee powder? Yes—decaf instant coffee works well if you prefer no caffeine.
- How can I make these gluten-free? Swap the all-purpose flour for a reliable 1:1 gluten-free baking blend and follow the same method.
- Can I freeze the assembled cookies before baking? Yes. Freeze the assembled raw cookies on a tray, then transfer to a bag. Bake from frozen—add a minute or two to the baking time.
- What substitute for cream cheese? Use a dairy-free cream cheese alternative to make a vegan-friendly filling; the texture and sweetness may vary slightly.
Related Recipe Ideas
Try other creative cookie recipes that pair well with coffee flavors, such as coffee-infused shortbread, cardamom shortbread with orange glaze, or cream cheese–filled chocolate cookies for more variety and inspiration.
Conclusion
These Coffee Swirled Marbled Chocolate Cream Cheese Cookies are both visually striking and deliciously balanced. The coffee and chocolate doughs create an eye-catching marble while the cream cheese center adds a creamy, tangy note. Follow the steps and tips for the best texture and presentation, and enjoy sharing these with friends and family.