
No-Bake Mint Chocolate Swirl Cheesecake Pie Recipe

Mint Chocolate Swirl Cheesecake Pie – No-Bake Dessert
Author: Patricia
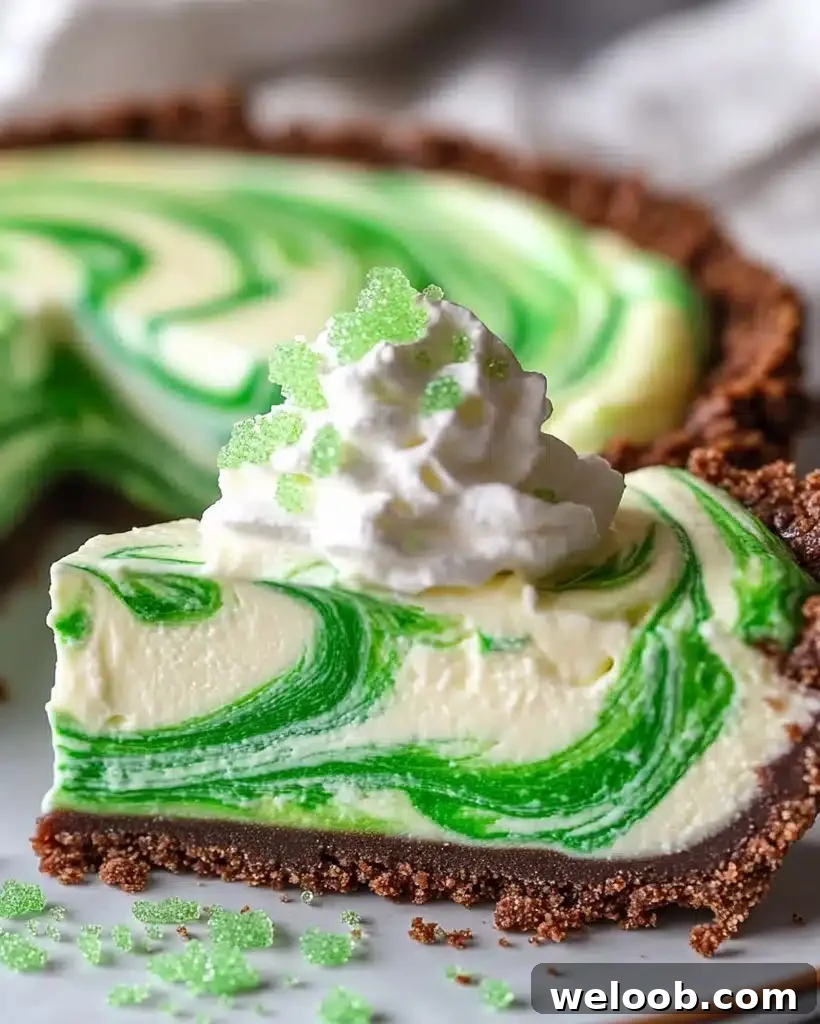
If you love mint chocolate desserts, this Mint Chocolate Swirl Cheesecake Pie will quickly become a favorite. It’s a no-bake cheesecake pie featuring a smooth, creamy filling, bright peppermint flavor, and an attractive marbled swirl that looks bakery-made but is simple to assemble at home. With straightforward ingredients and minimal hands-on time, it’s perfect for holidays, gatherings, or a special weekend treat.
Highlights:
- No baking required — mix, chill, and serve.
- Refreshing peppermint paired with rich chocolate and white chocolate.
- Beautiful green-and-white marbled swirl for a festive presentation.
- Great for St. Patrick’s Day, Christmas, birthdays, or entertaining.
Why You’ll Love This Mint Chocolate Swirl Cheesecake Pie
This no-bake pie combines airy cheesecake texture with intense chocolate notes and a cool peppermint finish. The swirl technique creates an eye-catching appearance, while the recipe remains approachable enough for baking beginners. It also adapts well — make it gluten-free, reduce sugar, or swap chocolates to suit taste.
Ingredients for Mint Chocolate Swirl Cheesecake Pie
For the Crust:
- 1½ cups chocolate cookie crumbs
- ¼ cup melted butter
Filling:
- 16 oz cream cheese, softened
- 1 cup powdered sugar
- 1 teaspoon vanilla extract
- ½ teaspoon peppermint extract (adjust to taste)
- 1½ cups heavy whipping cream
- 6 oz white chocolate, melted and slightly cooled
- Green food coloring (optional, to achieve mint hue)
- ½ cup mini chocolate chips
Garnish:
- Whipped cream
- Green sugared gummy candies (optional, for a festive touch)
Pro Tip: Use crushed gluten-free chocolate cookies to make a gluten-free crust.
How to Make Mint Chocolate Swirl Cheesecake Pie – Step-by-Step
Step 1: Make the Chocolate Crust
- Combine the chocolate cookie crumbs and melted butter in a bowl until evenly moistened.
- Press the mixture into a 9-inch pie pan, forming an even, compact crust.
- Chill the crust in the refrigerator while you prepare the filling to set it firmly.
Step 2: Prepare the Cheesecake Filling
- Beat together the softened cream cheese, powdered sugar, vanilla extract, and peppermint extract until smooth and lump-free.
- In a separate bowl, whip the heavy cream to stiff peaks.
- Gently fold the whipped cream into the cream cheese mixture to keep the filling light and airy.
- Slowly fold in the melted white chocolate until fully incorporated and smooth.
Step 3: Create the Swirl Effect
- Divide the finished filling evenly between two bowls.
- Add green food coloring to one bowl and mix until you reach a vibrant mint color, adjusting intensity as desired.
- Spoon alternating dollops of the white and green mixtures into the chilled crust.
- Use a toothpick or skewer to swirl the layers gently, creating a marble pattern without overmixing.
Step 4: Add Chocolate Chips & Chill
- Sprinkle mini chocolate chips across the top, pressing them in lightly so they stick as the filling sets.
- Refrigerate the pie for at least 4 hours, preferably overnight, until fully firm and sliceable.
Step 5: Garnish & Serve
- Before serving, pipe or spoon whipped cream on top and add green sugared gummies or other festive decor if desired. Slice with a warm knife for clean portions.
Enjoy your homemade Mint Chocolate Swirl Cheesecake Pie — a creamy, minty, chocolatey dessert that’s perfect for sharing.
Pro Tips for the Perfect Cheesecake Pie
- Chill overnight for the best texture and flavor development.
- Use good-quality chocolate and white chocolate for superior taste.
- Fold gently when combining whipped cream with the cream cheese to retain lightness.
- For a decorative finish, drizzle melted dark chocolate over slices just before serving.
Best Ways to Serve Mint Chocolate Swirl Cheesecake Pie
Pair slices with hot cocoa, a strong coffee, or a scoop of vanilla ice cream. For a clean slice, run your knife under hot water and dry it between cuts. For a holiday variation, sprinkle crushed candy canes on top for added crunch and peppermint intensity.
Nutritional Information (Per Serving)
- Calories: 410 kcal
- Carbohydrates: 35g
- Protein: 5g
- Fat: 29g
- Saturated Fat: 17g
- Sugar: 25g
If you want a lighter option, substitute sugar-free white chocolate and use a natural sweetener in place of powdered sugar.
Storage & Leftovers
Refrigerator:
Store the pie covered in an airtight container or wrapped tightly for up to 5 days. Keep it chilled until ready to serve.
Freezer:
Wrap portions or the whole pie tightly and freeze for up to 2 months. Thaw slowly in the refrigerator before serving to preserve texture.
FAQs – Answering Your Questions
Can I freeze Mint Chocolate Swirl Cheesecake Pie?
Yes. Wrap the pie well and freeze for up to 2 months. Thaw overnight in the fridge before serving for best results.
Can I use dark chocolate instead of white chocolate?
Absolutely. Using dark chocolate will give the filling a richer, deeper chocolate note. If you use dark chocolate, reduce or omit the food coloring to retain contrast.
How do I get a smooth cheesecake filling?
Start with room-temperature cream cheese and fully beat it smooth before folding in whipped cream. Make sure the melted chocolate is slightly cooled so it blends without seizing.
Related Recipes You’ll Love
- Easy Shamrock Lasagna Recipe – Best St. Patrick’s Dessert
- Cotton Candy Fudge Recipe – Easy & Irresistible Dessert
- Banana Cheesecake Cupcakes | Easy Dessert Idea
- Easy Blueberry Cheesecake Swirl Cookie
- Red Velvet Cheesecake Cupcakes – Delicious & Creamy
Conclusion
This Mint Chocolate Swirl Cheesecake Pie is an easy, no-bake dessert that delivers creamy texture, minty freshness, and eye-catching presentation. It’s ideal for celebrations or whenever you want a special dessert with minimal fuss. Try it, experiment with toppings, and enjoy sharing slices with friends and family.
Tried this recipe? Share your experience and photos — we’d love to hear how it turned out!