
Cornetti: Italian Croissant Recipe & Baking Tips

Cornetti—literally “little horns”—are the Italian take on the French croissant. Like their French cousins, they’re flaky, buttery, and light, but with a distinctly Italian sweetness and a slightly richer crumb. They carry a bit more personality and a lot of heart.

Some time ago a reader asked for a Cornetti (Italian croissants) recipe. I researched, experimented, and used a lot of butter, and now I’m excited to share this delicious, flaky pastry. If you’re Italian or learned tips from your Nonna, please share them in the comments—I’d love to hear your memories and tricks.
If you enjoy Italian pastries, consider trying my recipes for Pignoli Cookies, Zeppole, Torta Della Nonna, or Italian Cream Puffs.
Cornetto vs Croissant
Cornetti (plural of cornetto) are very similar to French croissants, but a few key differences set them apart:
- Both use enriched, laminated doughs related to brioche, but cornetti dough includes eggs, whereas traditional croissant dough typically does not—this gives cornetti a slightly richer texture.
- Cornetti tend to be a touch sweeter than classic French croissants.
- The classic cornetto shape is often straighter and plumper in the middle; the French croissant is usually rolled into a curved crescent.
- Cornetti are frequently filled before baking with options like pastry cream, crema pasticcera, or almond cream. Croissants are often filled after baking, but both are delicious with fillings such as crème mousseline or crème chiboust.
In many parts of the United States, cornetti are less common at coffee shops than other Italian pastries, but once you try this recipe you can enjoy authentic Italian croissants at home with your morning coffee.

Ingredients
These are the main ingredients and a few substitution suggestions:
- Bread flour and all-purpose flour. A blend gives the ideal texture, but you can use all-purpose only if needed.
- Warm milk. Whole milk yields the best flavor, but skim milk or warm water can be used.
- Granulated sugar. Light brown sugar can be substituted for a deeper, molasses-like flavor.
- Instant yeast. Notes in the recipe card explain how to convert to active dry yeast if necessary.
Some bakers add a little lemon zest to their laminated dough; you’ll find that in some cornetti recipes as well.
How to make Cornetti
You can make these cornetti in one day or split the process across two days (overnight refrigeration). Read the instructions below to decide which method suits you best. The recipe card at the bottom contains exact measurements and the full step-by-step procedure.
Prepare the butter
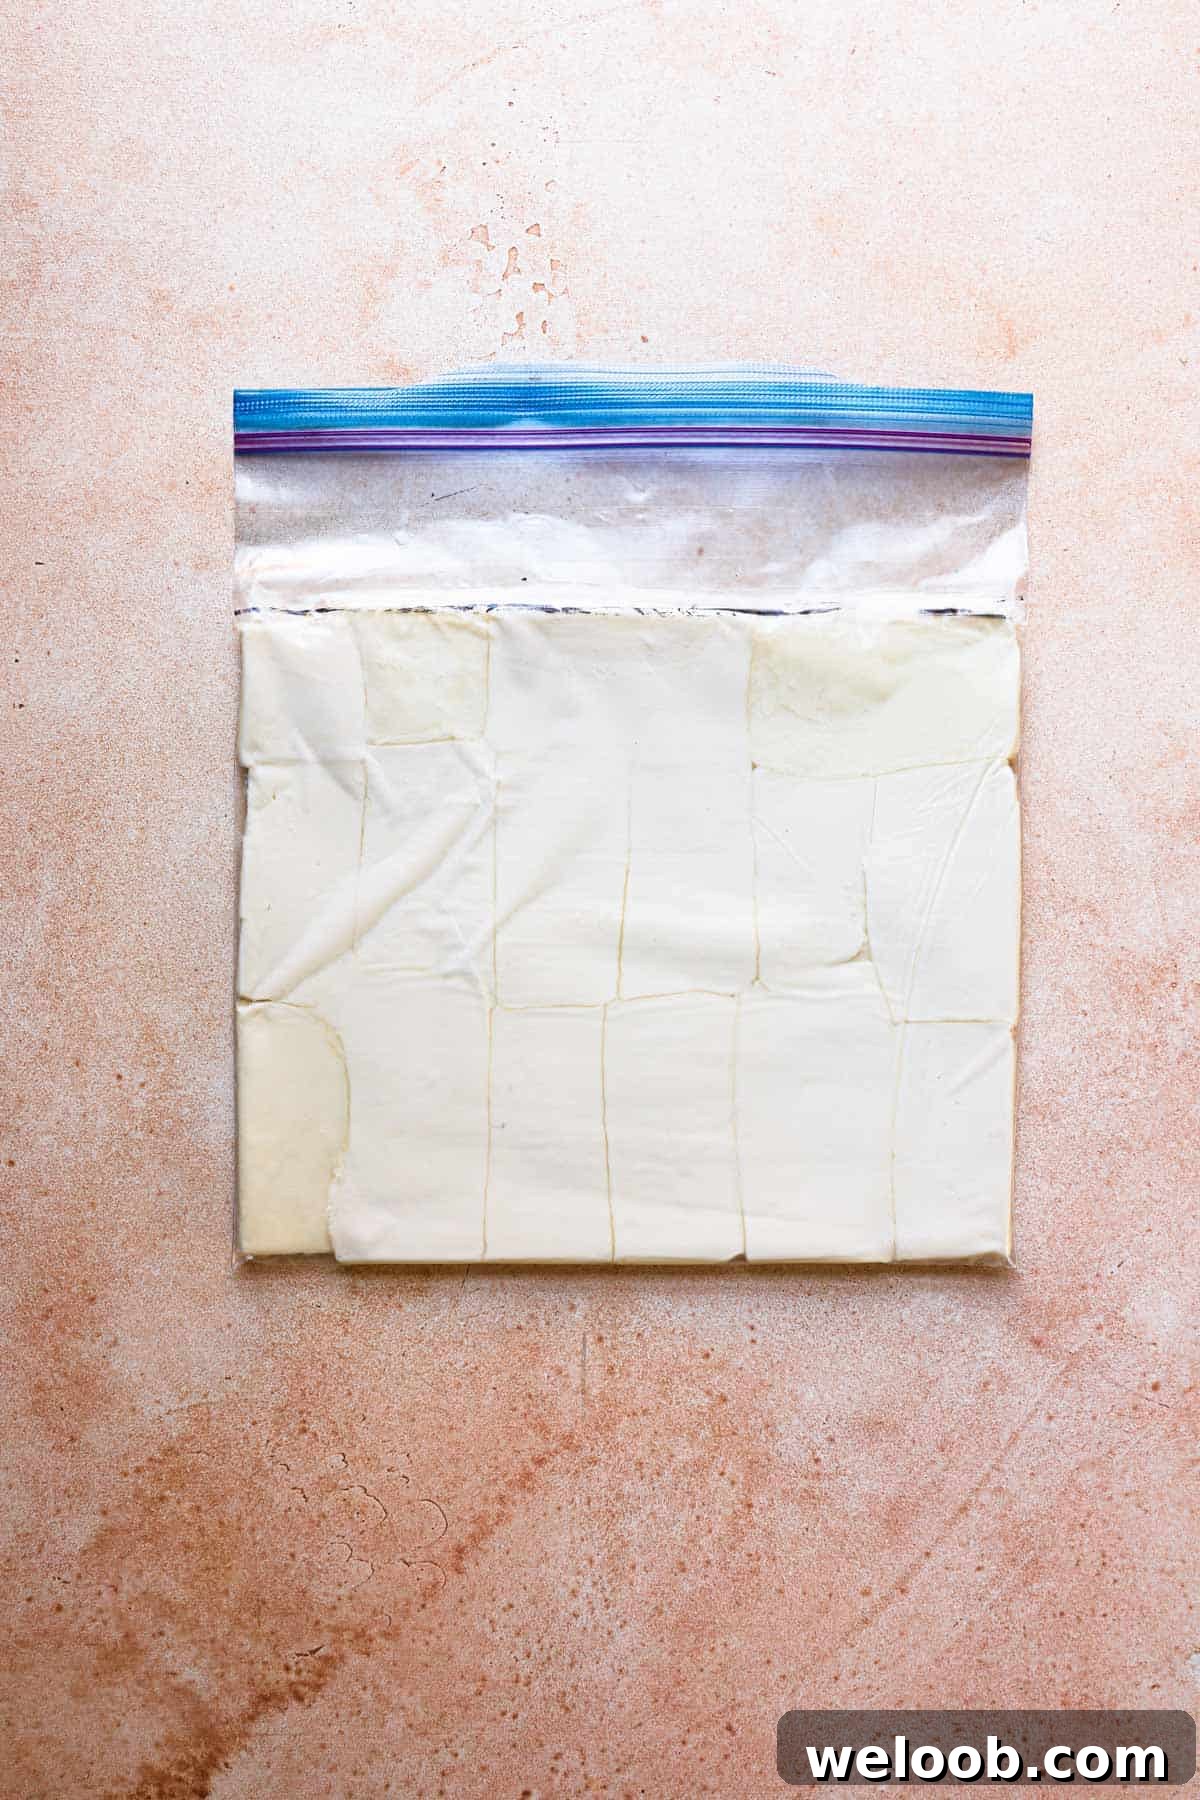
Form a flat butter block that fits the dough: wrap the butter in parchment and roll to a 9×10-inch rectangle, trimming edges for neatness. The butter should be pliable but cool—about 68°F (20°C)—so it rolls without breaking or spreading too thin.
If you prefer a shortcut, freeze the butter and grate it over the dough to incorporate it more quickly, though this alters the traditional lamination slightly.
Make the dough
Cornetti dough resembles brioche dough, but we add only a small amount of butter directly to the dough; the rest becomes part of the laminated layers. Mix the ingredients to form a loose dough, then knead briefly—about 3–4 minutes—so you don’t overdevelop the gluten. Further gluten development happens during rolling and folding.
When the dough comes together, place it in an oiled bowl, cover, and rest for one hour, then refrigerate overnight—or leave at room temperature for about three hours if you plan to finish the same day.
This is the same laminating process used for croissants, puff pastry, cruffins, and pain au raisin.
Locking the butter
This is the first step of lamination. Keep a bowl of flour, a pastry brush, and a rolling pin at hand. Remove the dough and butter from the fridge so the butter is pliable; it should bend without cracking and not stick excessively to its wrap.
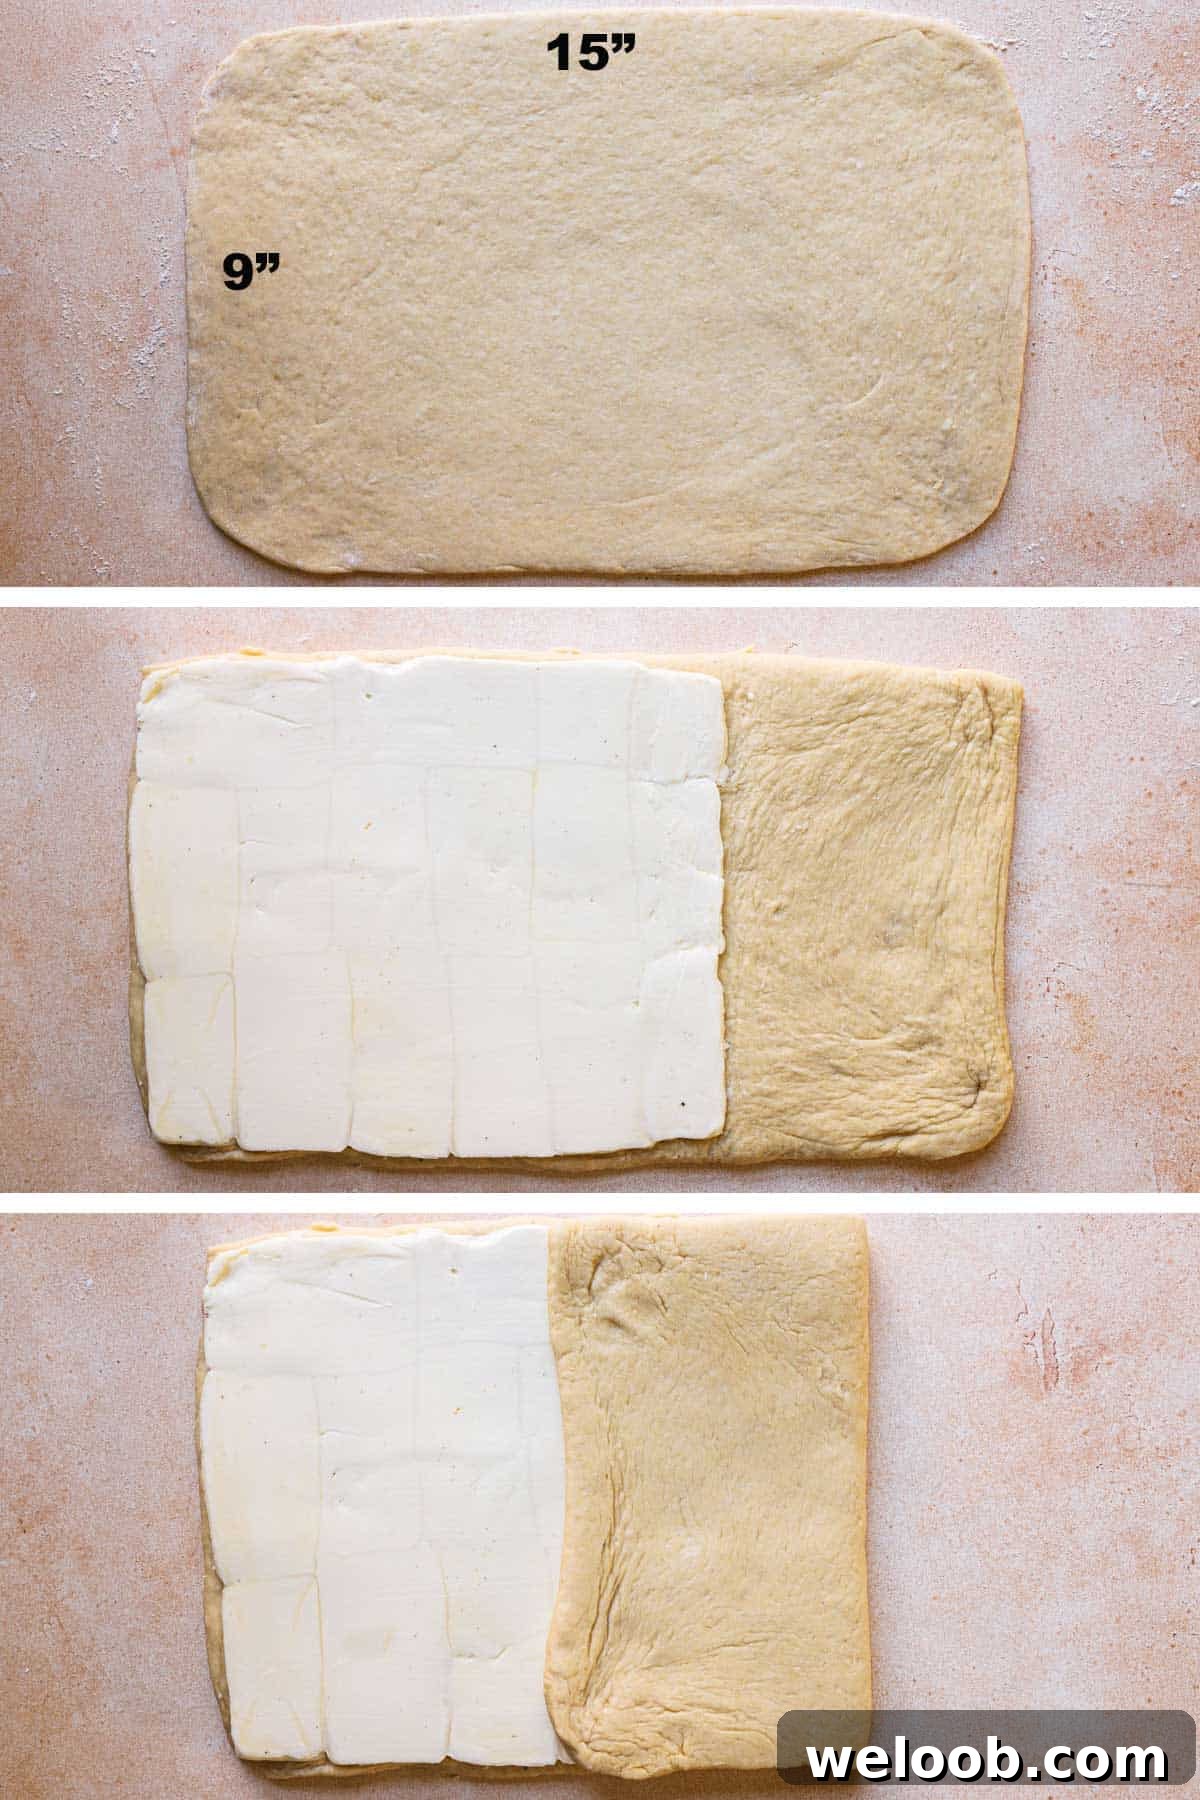
Place the butter block on the dough so the butter occupies one side with no raw dough extending beyond it. Fold the unbuttered dough over the butter, then fold the buttered part back over to enclose it. Ensure there are no gaps between folds.
Folding
First fold — the book fold
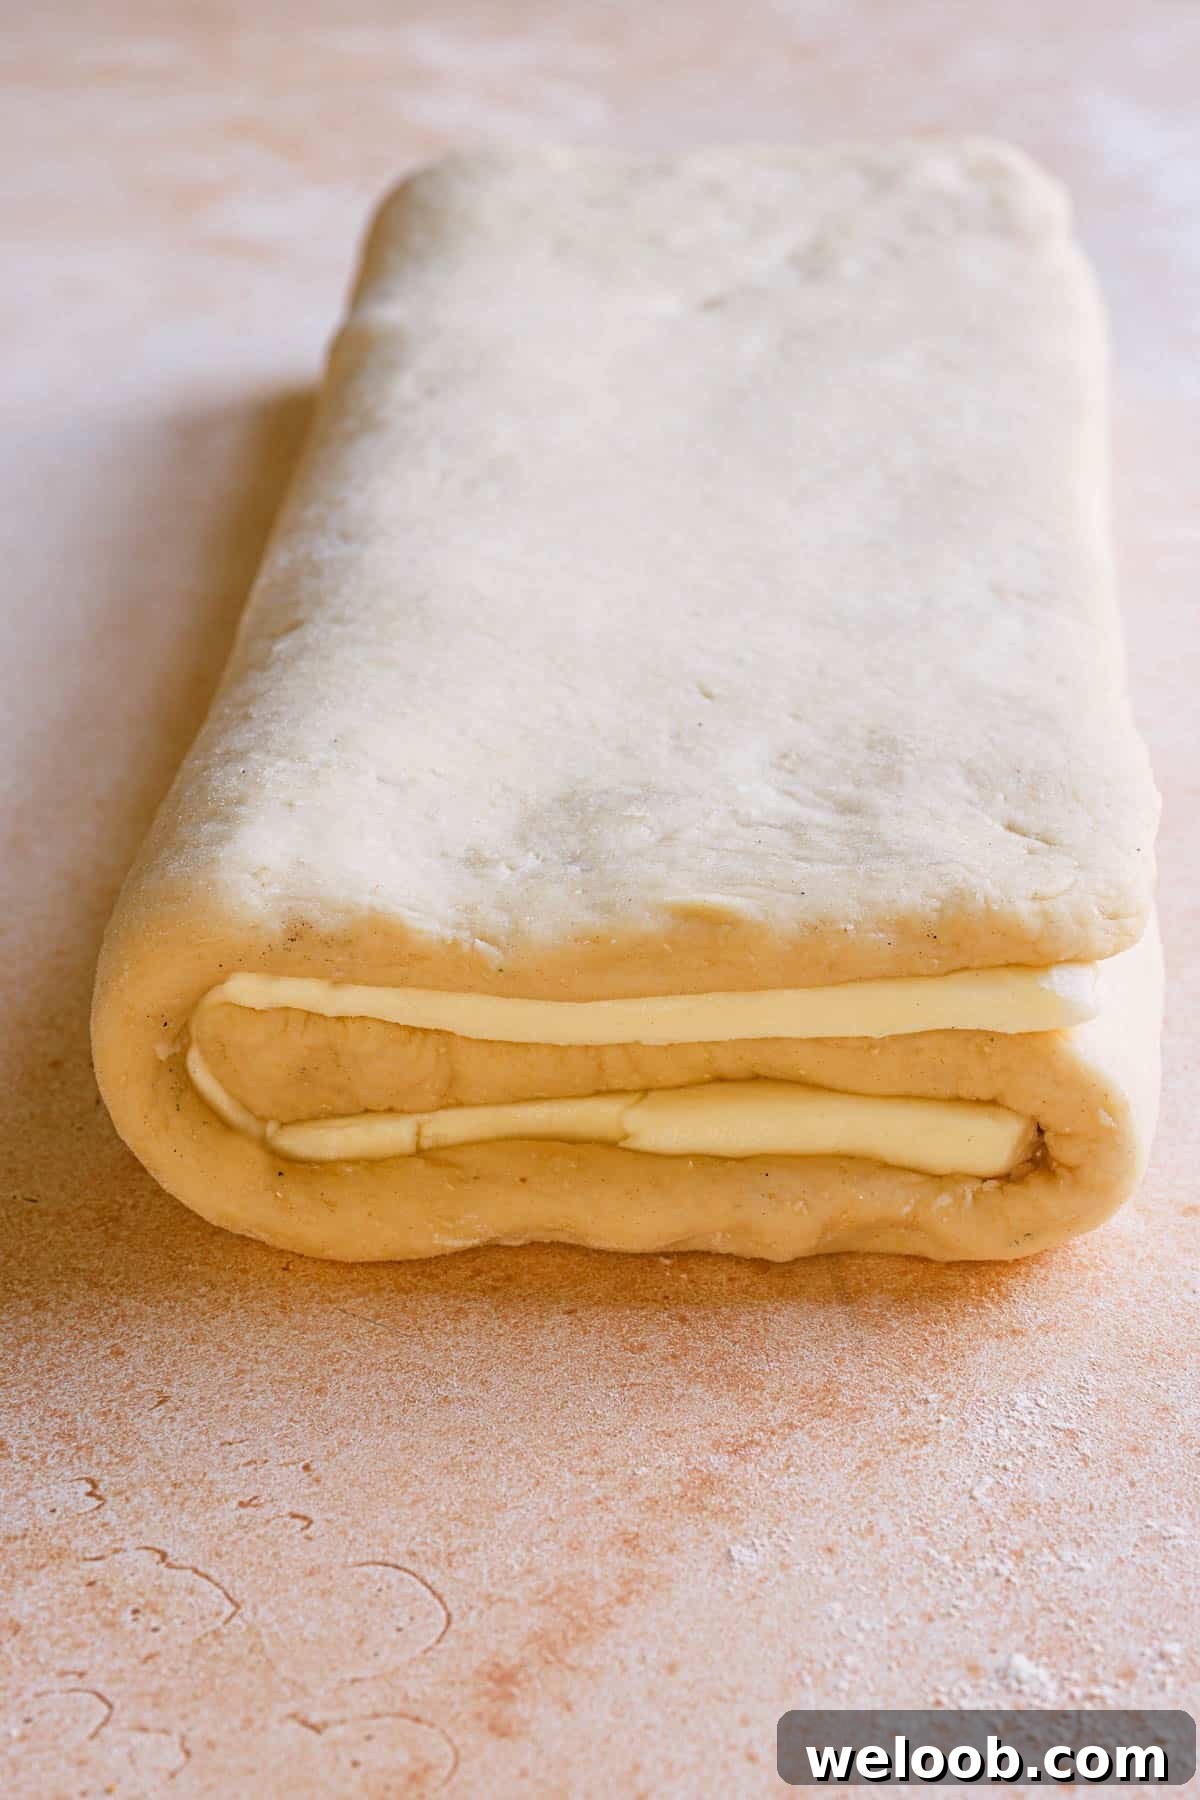
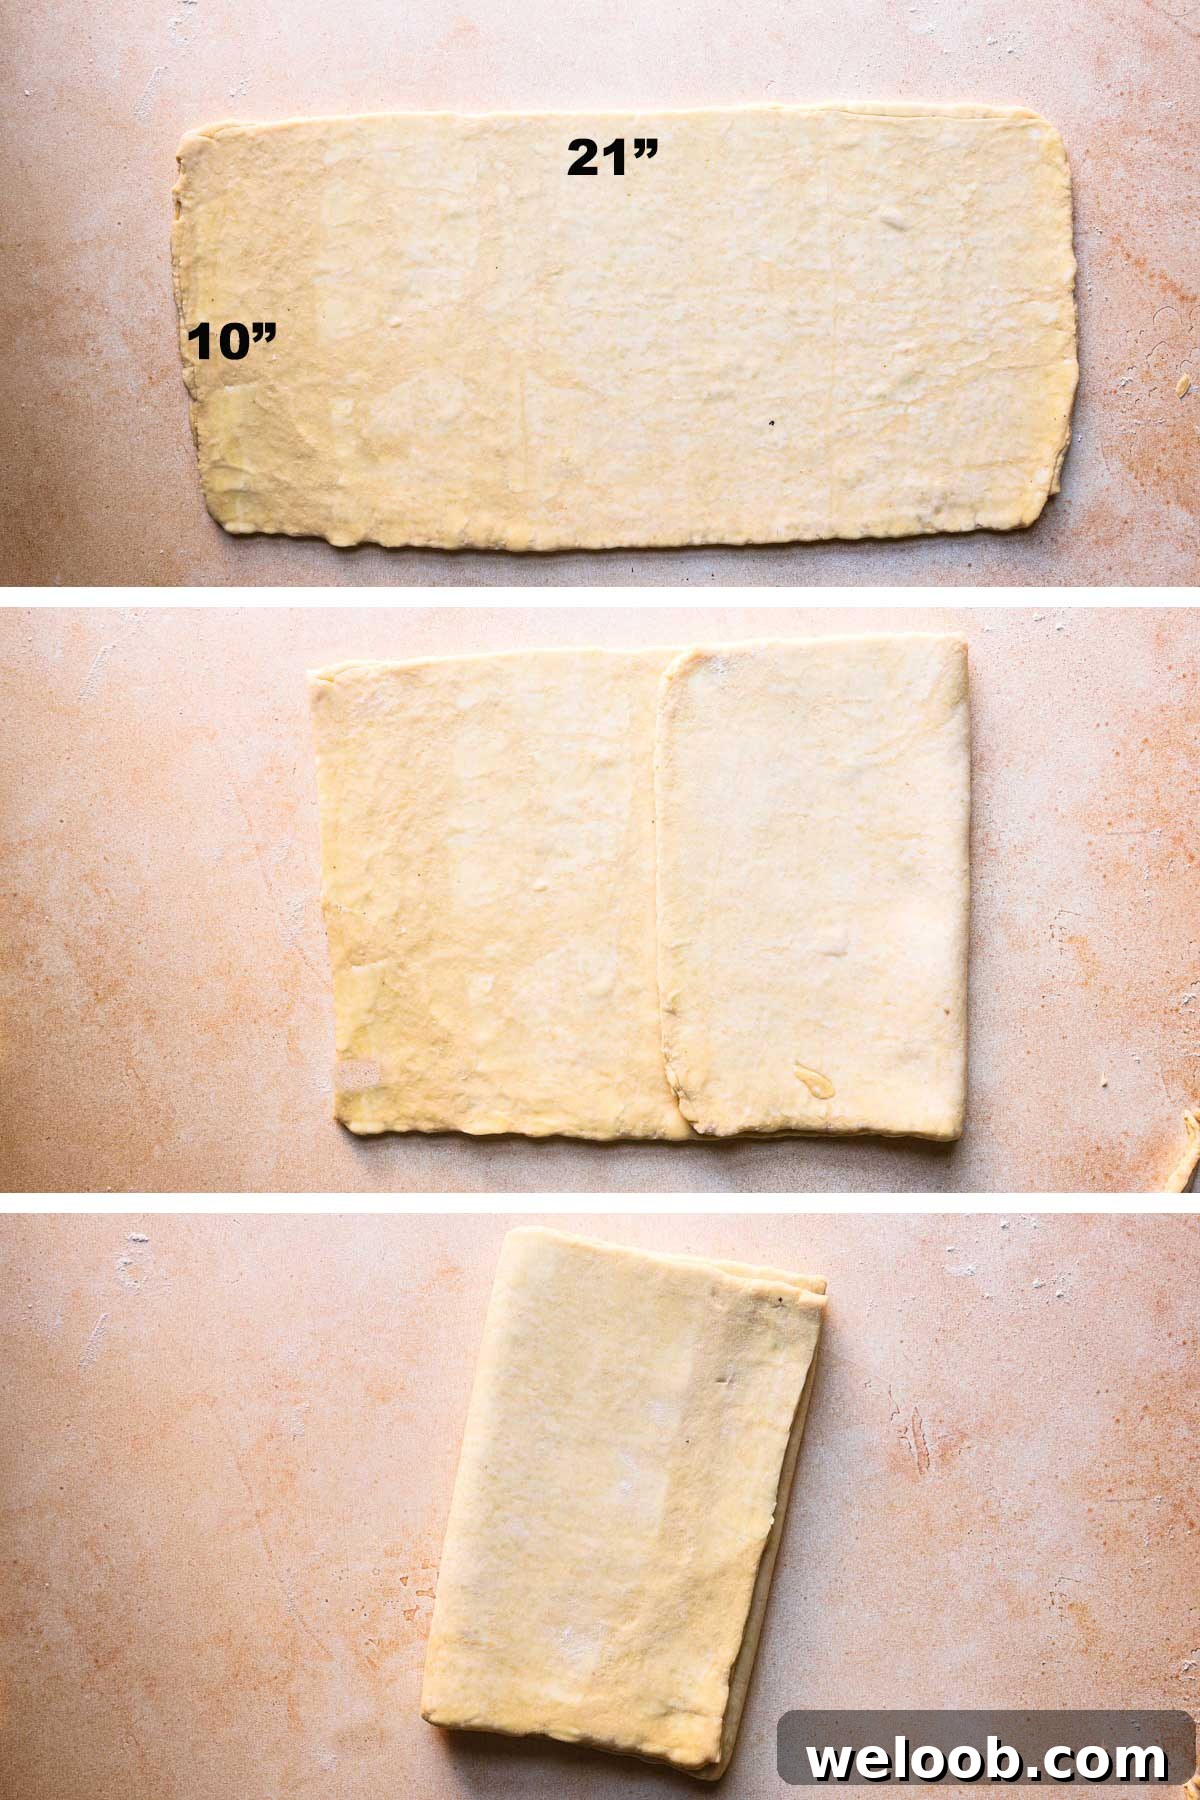
The book fold divides the dough into four panels by folding each long side toward the center, then folding one half over the other so the layers stack like a closed book. Wrap and chill or freeze for about 25 minutes before the next folds.
Second and third folds — the three-folds
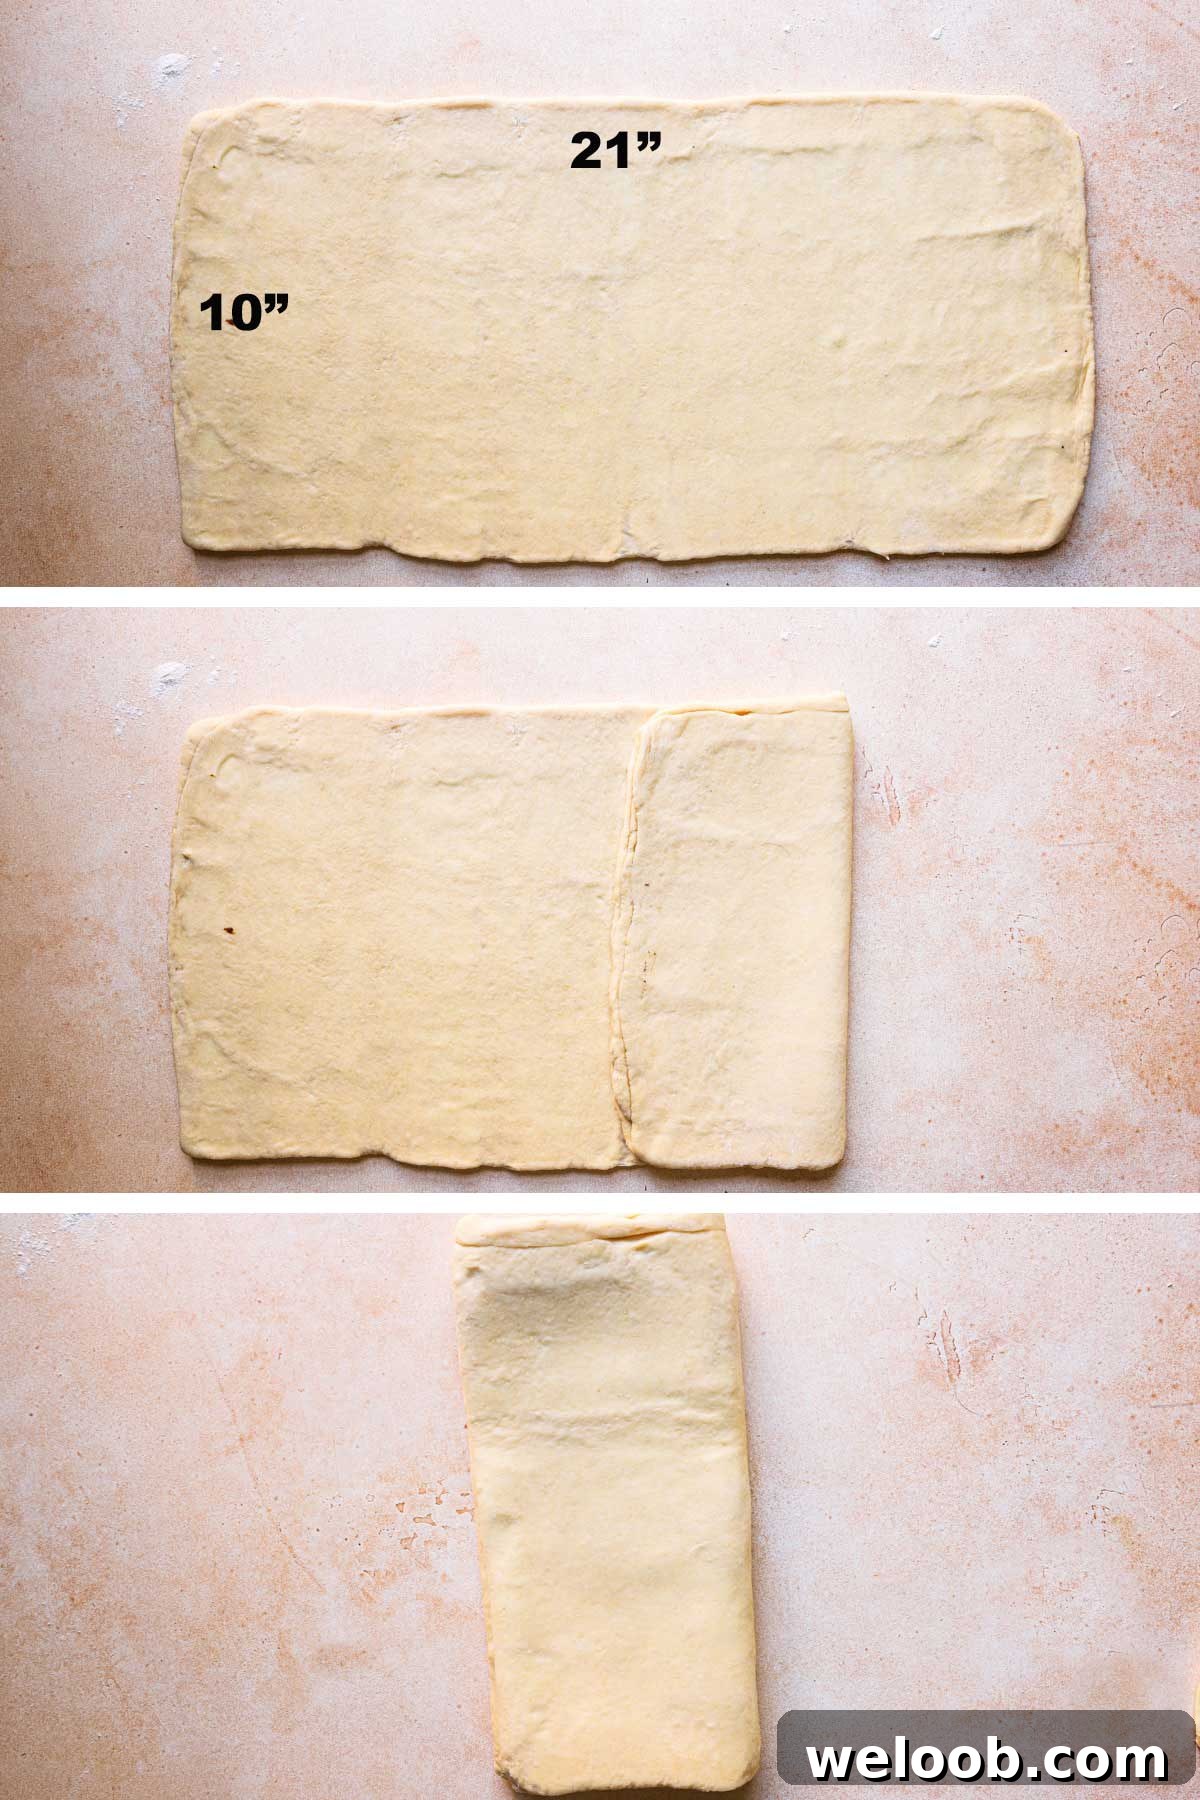
Next perform two single letter folds (three-part folds). Mentally divide the rectangle into thirds, fold the left third over the center, then the right third over that center. Repeat once more. Do not fold more than three full times; too many folds can compress the butter and reduce oven spring.
Shaping
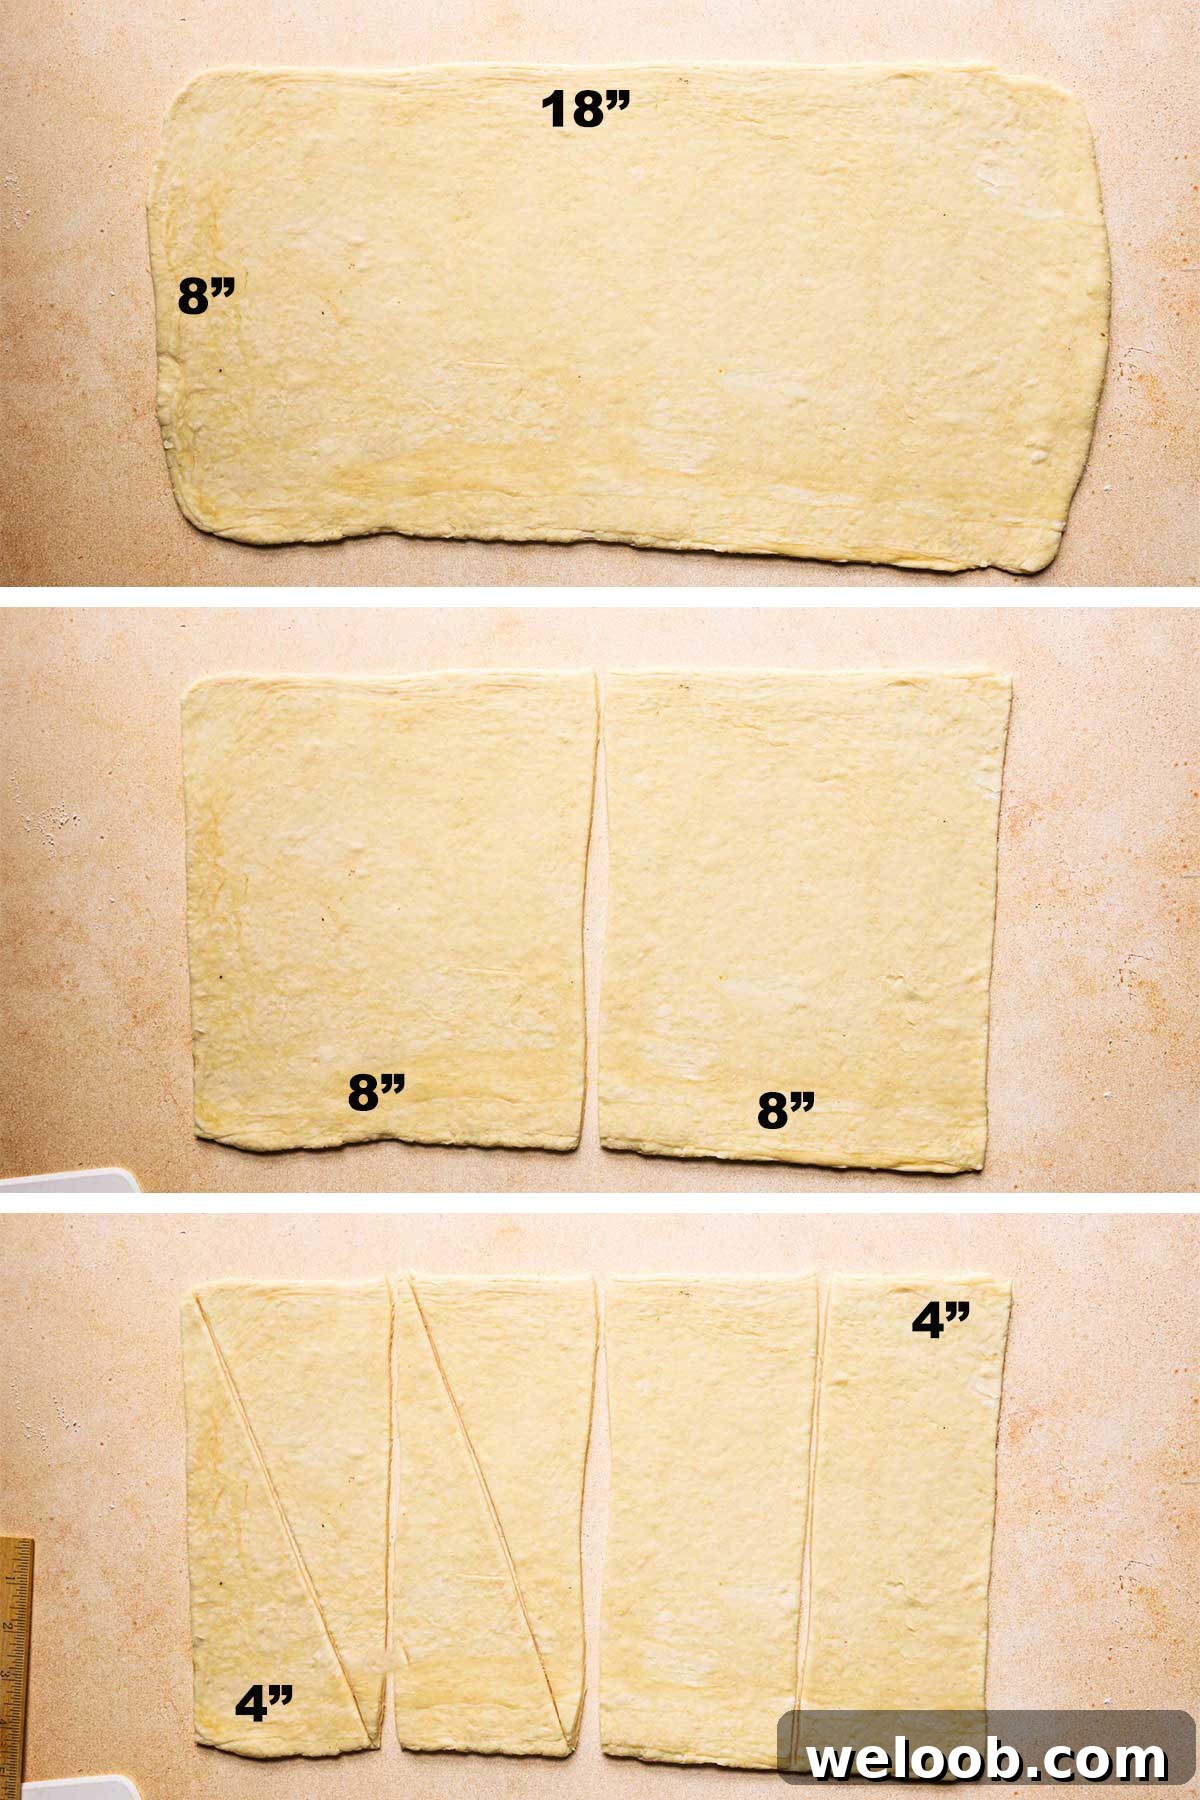
Shaping is the most enjoyable step. A standard cornetto triangle is roughly 4×8 inches. Work with one half of the dough while keeping the other chilled.
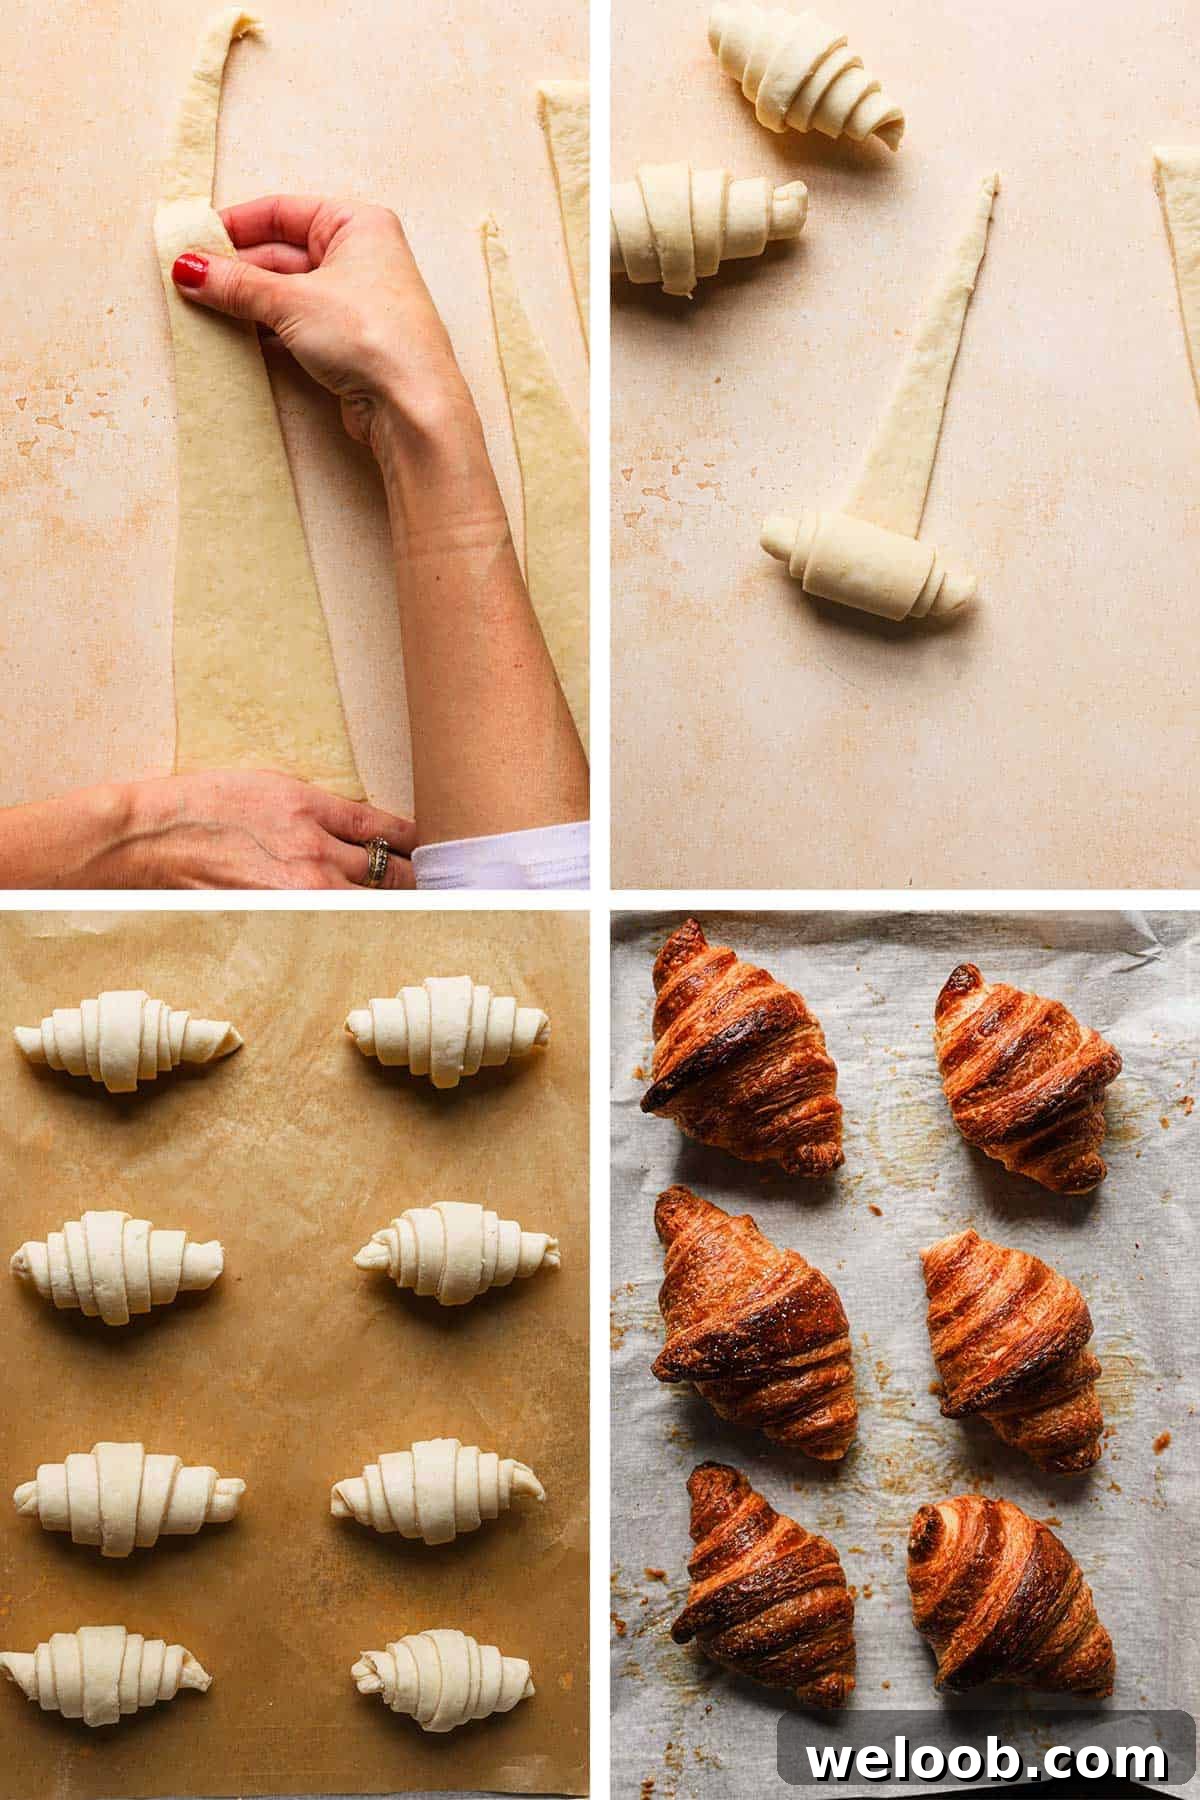
Roll each piece into an 18×8-inch rectangle. Trim edges, then cut vertically every 8 inches to yield two 8×8 squares. Cut each square diagonally into two triangles. Gently stretch each triangle from the base, then roll from the wide end toward the tip to form the horn.
Place shaped cornetti on a parchment-lined baking sheet, cover, and allow to proof for 1.5–2 hours until puffy.

Expert tips
- Use a kitchen scale for accurate measurements; precision yields consistent results.
- Keep the dough cold between folds. Refrigerate for 2–3 hours or overnight when possible.
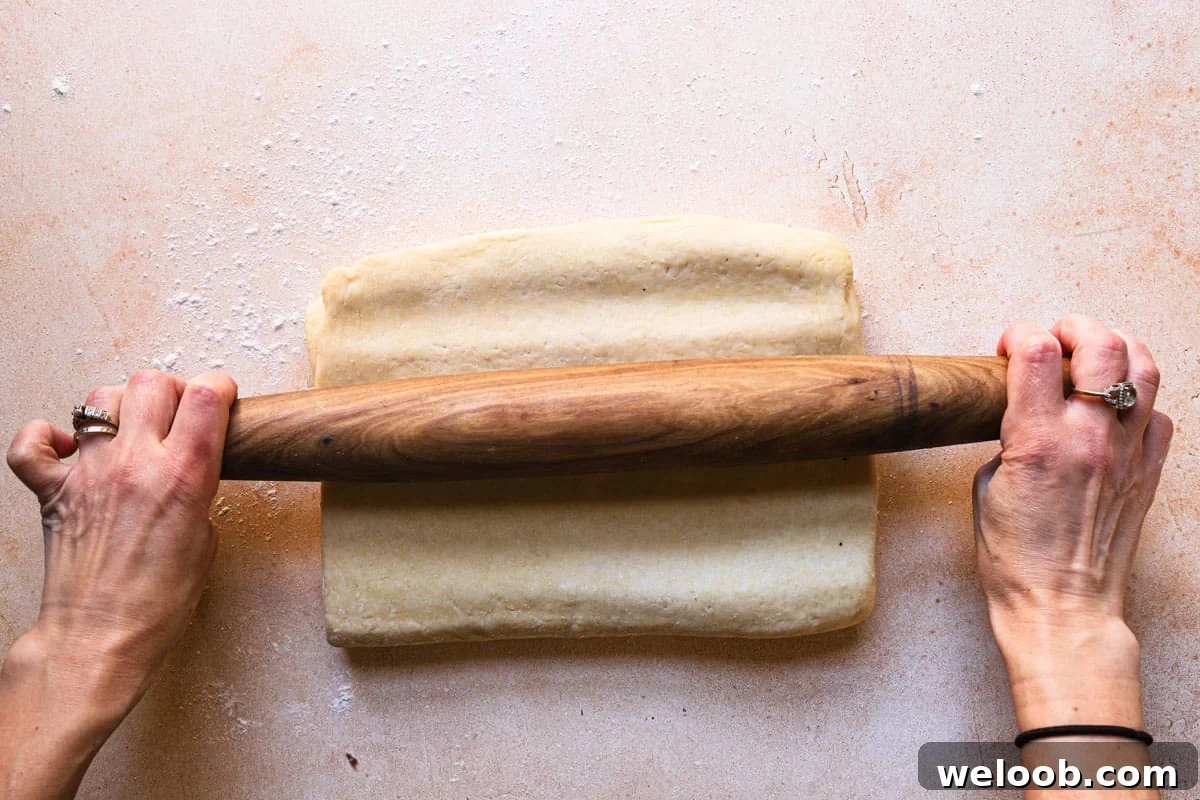
- Before each fold, lightly tap the dough with a rolling pin to a 1/2-inch thickness to avoid over-activating the gluten. This reduces bounce-back when rolling.
- Use a ruler or bench scraper to keep rectangles straight as you roll.
- Check short edges to confirm visible dough-butter layers. If layers aren’t obvious, slice a very thin edge (about 3mm) to reveal them. If that’s confusing, it’s fine to continue without doing this.
- Flour your workspace as needed so the dough slides easily without sticking.
Storing and make-ahead
Make-ahead: After completing lamination, wrap the dough tightly and freeze for up to four weeks. When ready to bake, thaw in the refrigerator for 8 hours, then shape and bake as directed.
Storage: Cornetti are best fresh, within 24 hours. Store leftovers in an airtight container or bag for up to three days. Stale cornetti work wonderfully in recipes like almond cornetto, pistachio cornetto, brioche French toast, or a French toast casserole.
More pastry recipes you might enjoy
Try Chocolate Cream Puffs, How to Make Choux Pastry, or Puff Pastry Croissants for additional laminated and filled-pastry inspiration.

Print
Pin
Flaky Cornetti | A step-By-Step Guide
Equipment
-
Large bowl
-
Parchment paper
-
Rolling pin
-
Pizza roller or sharp knife
-
Ruler or bench scraper
Ingredients
Butter Block
- 1 1/2 Cups + 2 Tablespoons (350g) Unsalted butter, sliced into 1/2-inch thick vertical stripes. Soft.
Dough
- 2 Cups (240g) Unbleached all-purpose flour
- 2 Cups (240g) Bread flour
- 1/3 Cup (70g) Granulated sugar
- 2 1/4 teaspoons Instant yeast
- 1/2 teaspoon Salt
- 2 Large Eggs at room temperature
- 3/4 Cup (180ml) Lukewarm milk or water
- 2 tablespoons (25g) Unsalted butter
- 1/2 Cup Flour for dusting (may not use all of it)
- 1 Egg Beaten, for egg wash
Instructions
Prepare the Butter
-
Arrange the butter slices side by side in a large freezer bag or between parchment sheets. Use a rolling pin to flatten them into a single, even block.
-
Refrigerate the butter block until ready to use.
Make the dough
-
Combine all dough ingredients in the bowl of a stand mixer and mix until they form a cohesive dough.
-
If you use active dry yeast, increase the amount to 1 tablespoon. Bloom it first by mixing with the warm water and 1 teaspoon of sugar, and let sit 15–20 minutes until foamy.
-
Once the dough comes together, mix for 3–4 minutes. Do not overmix.
-
Place the dough in an oiled bowl, spray the surface with oil, and cover with plastic wrap. Let rest 1 hour, then refrigerate overnight, or leave at room temperature for about 3 hours.
Locking the butter
-
Remove the butter about 20 minutes before you plan to roll so it’s pliable but cool.
-
Lightly flour your work surface. Tap the dough with a rolling pin until it’s roughly 1/2 inch thick to relax the gluten—don’t roll fully yet or it will bounce back.
-
Roll the dough into a 9×15-inch rectangle, straightening the edges with a ruler or bench scraper.
-
Unwrap the butter and place it on the left side of the dough so no raw dough extends past the butter. Fold the uncovered dough over the butter, then fold the buttered side over to encase it.
-
Dust off excess flour, wrap the dough in plastic, place on a baking sheet, and freeze 25 minutes.
Fold #1 — the book fold
-
Remove the dough from the freezer, flour the surface, and tap it to 1/2-inch thickness.
-
Roll to a 21×10-inch rectangle with the long side facing you. Fold the dough in half, then unfold to mark the center line.
-
Fold each long side toward the center, then fold one end over the other to close the “book.” Dust, wrap, and freeze for 25 minutes.
Folds #2 & #3 — the three-folds
-
Tap the dough to 1/2 inch, then roll to a 21×10-inch rectangle.
-
Mentally divide into thirds and fold the left third over the center, then the right third over that center (a single three-fold). Dust, wrap, and freeze 25 minutes.
-
Repeat this three-fold once more, then wrap and refrigerate 1.5–2 hours before shaping.
Shaping the cornetti
-
Divide the chilled dough in two and keep one half refrigerated while you shape the other.
-
Roll to an 18×8-inch rectangle on a lightly floured surface.
-
Trim edges and cut into two 8×8-inch squares, then cut each square diagonally to make triangles.
-
Gently stretch each triangle from the base, roll from the wide end toward the tip, and place on a parchment-lined sheet. Cover and let rise 60–90 minutes.
-
Brush with beaten egg and bake at 400°F (200°C) for 15 minutes, then reduce to 350°F (180°C) and bake 8–10 minutes more until golden and cooked through.
-
Remove from the oven, cool slightly, and enjoy warm.