
Butterfinger Candy Bar Poke Cake Recipe
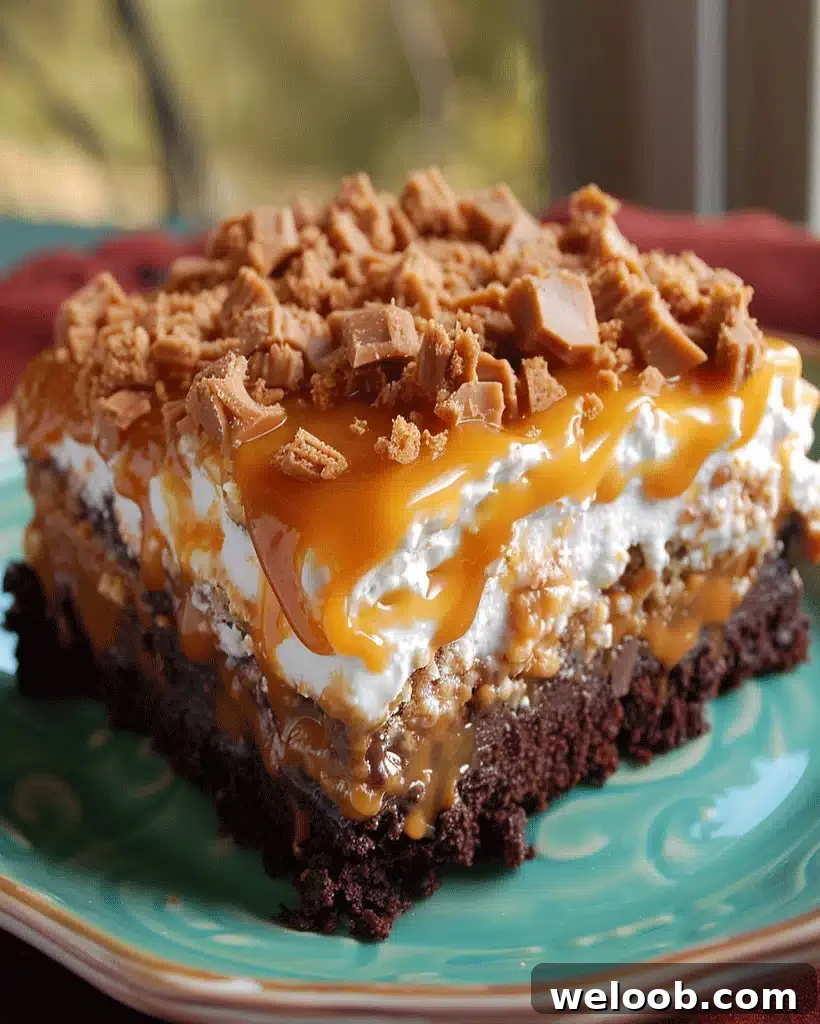
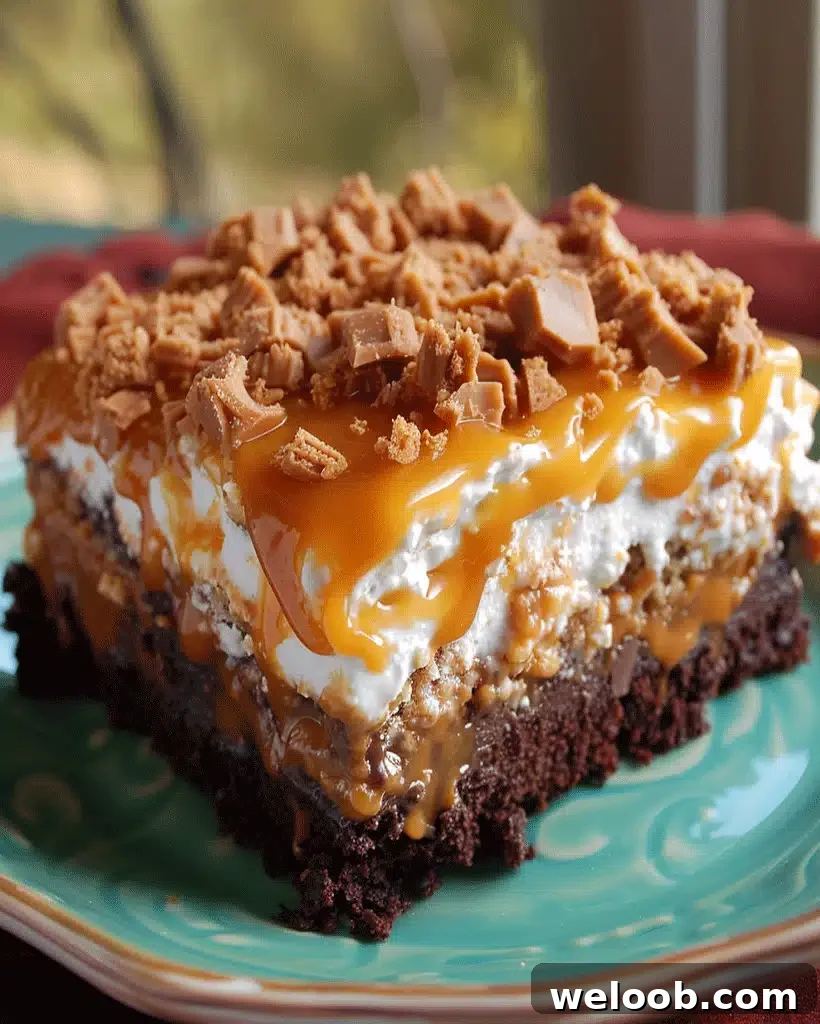
Butterfinger Candy Bar Poke Cake – Irresistible Dessert
Author: Patricia
Description
If you love rich chocolate, gooey caramel, and a satisfying crunch, this Butterfinger Candy Bar Poke Cake delivers on all fronts. It’s an easy, crowd-pleasing dessert that layers a moist chocolate cake with a sweet caramel-condensed milk filling and finishes with whipped topping and crushed Butterfinger bars. Ideal for potlucks, family dinners, or any time you’re craving a candy-bar–inspired treat, this poke cake is simple to assemble and spectacular to serve.
Introduction
Poke cakes are beloved because they turn an ordinary sheet cake into a multi-textured dessert: you bake the cake, poke holes across the surface, then let a flavorful liquid soak into those holes so every bite is extra moist and flavorful. This version pairs a chocolate base with a caramel-condensed milk soak and crunchy Butterfinger pieces for contrast — a perfect balance of soft, creamy, sweet, and crisp.
Ingredients
- 1 box chocolate cake mix (plus the eggs, oil, and water called for on the box)
- 1 can (14 oz) sweetened condensed milk
- 1 jar (12 oz) caramel sauce
- 1 container (8 oz) whipped topping (such as Cool Whip), thawed
- 4–5 Butterfinger candy bars, crushed
Optional substitutions:
- For gluten-free: use a gluten-free chocolate cake mix.
- For dairy-free or vegan: use dairy-free whipped topping and a plant-based caramel alternative.
Instructions
Step 1 — Bake the Cake
Prepare the chocolate cake mix following the package directions. Bake in a 9×13-inch pan for even thickness. Allow the cake to cool for about 10 minutes so it is warm but not hot; this temperature helps it absorb the soaking mixture.
Step 2 — Poke the Cake
Using the handle of a wooden spoon (or a similar tool), poke holes all over the cake surface. Space the holes evenly and make them deep enough to reach the bottom so the filling can penetrate throughout.
Step 3 — Make and Add the Filling
In a bowl, whisk together the sweetened condensed milk and caramel sauce until smooth. Pour the mixture slowly and evenly across the cake, making sure it sinks into the holes. Work gently so you don’t tear the cake surface.
Step 4 — Cool Completely
Let the cake cool completely at room temperature or in the refrigerator. Cooling ensures the whipped topping won’t melt when you spread it and allows the flavors to meld.
Step 5 — Add Whipped Topping
Spread the thawed whipped topping evenly over the cooled, soaked cake. The light topping balances the cake’s richness.
Step 6 — Top with Crushed Butterfinger
Finely crush the Butterfinger bars and sprinkle them generously over the whipped topping. The crunchy candy adds texture and that unmistakable Butterfinger flavor.
Step 7 — Chill and Serve
Refrigerate the cake for at least one hour to set. Slice into squares and serve chilled for best texture and flavor.
Notes & Helpful Tips
- Chill before serving: Refrigeration firms the cake and blends flavors, making it easier to slice and more satisfying to eat.
- Crush candy finely: Use a rolling pin or food processor to break Butterfinger bars into small, crunchy pieces that distribute evenly across the cake.
- Try different bars: If you prefer, substitute other crispy candy bars such as Crunch, Twix, or Heath for a different taste profile.
- Homemade whipped topping: For a fresher topping, whip 1 cup heavy cream with 2 tablespoons powdered sugar and 1 teaspoon vanilla until stiff peaks form.
- Flavor variations: Swap the chocolate cake mix for vanilla or peanut butter to complement different candy bars or to change the overall flavor.
Serving Suggestions
Serve this poke cake with a scoop of vanilla ice cream or an extra dollop of whipped cream. A drizzle of additional caramel or chocolate sauce just before serving adds visual appeal and extra indulgence. Pair with a strong coffee or a cold glass of milk to balance the sweetness.
Nutritional Information (per serving)
- Calories: 350
- Total Fat: 18 g
- Saturated Fat: 9 g
- Cholesterol: 50 mg
- Sodium: 280 mg
- Total Carbohydrates: 42 g
- Sugars: 30 g
- Protein: 4 g
Note: Nutrition values are estimates and will vary based on exact products and portion sizes used.
Storage & Make-Ahead
Store leftovers in an airtight container in the refrigerator for up to 4 days. The cake often tastes even better after a day as the layers settle and the flavors develop. To freeze, omit the whipped topping: cool the soaked cake, wrap tightly in plastic wrap, and freeze up to 2 months. Thaw in the refrigerator before adding whipped topping and crushed candy.
Frequently Asked Questions
Can I make this cake ahead of time?
Yes. Making it a day ahead enhances the flavor and texture. Add the candy topping just before serving for maximum crunch.
Can I use homemade caramel?
Absolutely — homemade caramel works beautifully and can make the cake more flavorful and personal.
What if I don’t have Butterfinger bars?
Substitute other crispy candy bars such as Crunch, Twix, or Heath to achieve a similar crunchy texture and complementary flavors.
Conclusion
This Butterfinger Candy Bar Poke Cake is a simple yet impressive dessert that combines moist chocolate cake, a sweet caramel-condensed milk soak, and crunchy candy for a texture-packed finish. Whether you’re serving it at a gathering or enjoying a slice at home, it’s an easy crowd-pleaser that delivers candy-bar flavor in every forkful. If you try it, consider sharing a photo — it’s a dessert worth showing off.