
How to Make Chocolate Snowball Cookies for the Holidays
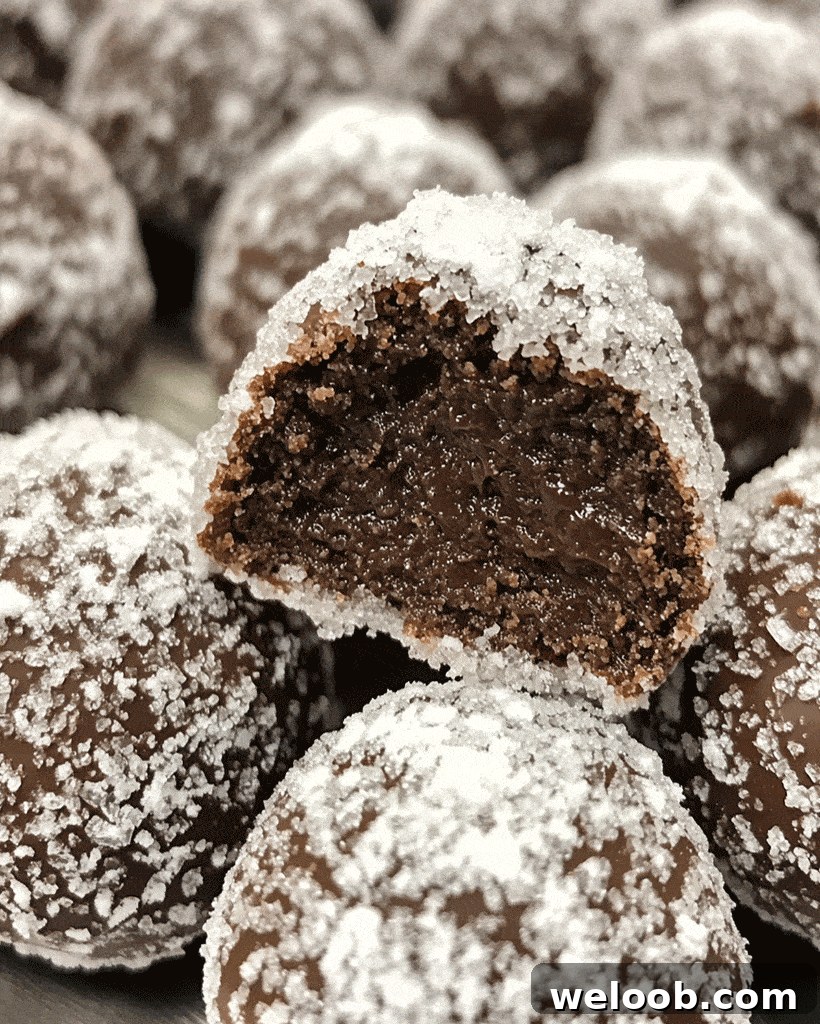
Welcome, cookie lovers! As the holiday season approaches, there’s nothing cozier than baking a batch of Festive Chocolate Snowball Cookies. These melt-in-your-mouth treats—sometimes called chocolate Mexican wedding cookies or Russian tea cakes—are a chocolate twist on the classic snowball. Rolled in powdered sugar to look like fresh snow, they’re as pretty as they are delicious. Below is a clear, easy-to-follow recipe so you can make a delightful batch for holiday gatherings, cookie exchanges, or simple weeknight indulgence.
Introduction
These Festive Chocolate Snowball Cookies add deep cocoa flavor to the timeless snowball cookie. The dough stays tender and crumbly, and the double coating of powdered sugar creates that signature snowy appearance. They’re straightforward to prepare, adaptable for dietary needs, and ideal for sharing—whether you’re an experienced baker or trying your first batch of holiday cookies.
Ingredients for Festive Chocolate Snowball Cookies
Gather these ingredients for the best results:
- 1 cup unsalted butter, softened
- 1/2 cup powdered sugar (plus extra for rolling)
- 1 teaspoon vanilla extract
- 2 cups all-purpose flour
- 1/4 cup cocoa powder
- 1/2 teaspoon salt
- 1 cup finely chopped nuts (optional—pecans or walnuts work well)
Substitutions:
- Gluten-free: Replace the all-purpose flour with a 1:1 gluten-free baking flour.
- Nut-free: Omit the nuts or use toasted seeds for a similar texture.
How to Make Festive Chocolate Snowball Cookies – Step by Step
Step 1: Prepare the oven and baking sheet
- Preheat the oven to 350°F (175°C).
- Line a baking sheet with parchment paper to prevent sticking and promote even browning.
Step 2: Mix the dough
- In a large mixing bowl, cream the softened butter and powdered sugar together until light and fluffy—this creates a tender texture.
- Add the vanilla extract and mix until incorporated.
Step 3: Add the dry ingredients
- Gradually add the flour, cocoa powder, and salt to the butter mixture.
- Mix until the dough is smooth and the dry ingredients are fully combined.
Step 4: Fold in nuts (optional)
- If using nuts, gently fold them into the dough until evenly distributed. The nuts add a pleasant crunch and balance the chocolate.
Step 5: Shape the cookies
- Roll the dough into 1-inch balls and place them on the prepared baking sheet. Space them about 1 inch apart to allow even baking.
Step 6: Bake
- Bake for 12–15 minutes, or until the edges are set. The tops may develop slight cracks—that’s normal and adds a rustic look.
- Let the cookies cool on the baking sheet for about 5 minutes to firm up slightly before handling.
Step 7: Add the snowy coating
- While still warm, roll each cookie gently in powdered sugar for the first layer of “snow.”
- After the cookies are completely cool, roll them again in powdered sugar to create a stable, festive coating.
Helpful Tips
- Softened butter: Use butter that is soft but not melted. This helps produce a light, creamy dough that holds its shape.
- Roll twice: For a crisp, non-absorbing powdered sugar coating, roll the cookies once warm and once after they have fully cooled.
- Chill if needed: If the dough is very soft, chill it for 10 minutes to make rolling easier.
- Even portions: Use a small cookie scoop for consistent sizes and uniform baking.
- Flavor variations: Add a dash of peppermint extract for a holiday twist, or stir in orange zest for a bright note.
Serving Suggestions
Serve these Chocolate Snowball Cookies with hot cocoa, coffee, or spiced tea. They make a lovely addition to a holiday cookie platter and are perfect packaged in tins or gift bags for friends and neighbors. Their bite-sized shape is great for sharing and sampling.
Nutritional Information (Per Serving)
- Calories: 90 kcal
- Total Fat: 6 g
- Saturated Fat: 3.5 g
- Carbohydrates: 10 g
- Fiber: 1 g
- Sugars: 5 g
- Protein: 1 g
Note: Nutritional values are approximate and will vary depending on exact ingredients and portion sizes.
Storage and Leftovers
Store cookies in an airtight container at room temperature for up to one week. For longer storage, refrigerate or freeze them. When freezing, layer parchment paper between cookies to prevent sticking. Thaw at room temperature before serving.
Frequently Asked Questions (FAQs)
1. Can I make these without cocoa powder? Yes—omit the cocoa to make a classic, non-chocolate snowball cookie.
2. Can I make them gluten-free? Absolutely. Use a 1:1 gluten-free baking mix in place of all-purpose flour.
3. Why do the cookies crack on top? Small cracks are normal and part of the snowball cookie’s charm—they indicate the interior is tender while the exterior sets.
4. How do I prevent powdered sugar from absorbing into the cookie? Rolling once warm and again when fully cooled creates a powdery outer layer that stays bright and “snowy.”
Related Recipes
- Christmas Sparkle Sugar Cookies – Festive Holiday Treats
- Winter Wonderland Chocolate Chip Christmas Cookies
Conclusion
These Festive Chocolate Snowball Cookies are an easy, crowd-pleasing holiday confection. With a tender cocoa dough, optional crunchy nuts, and a double dusting of powdered sugar, they make an attractive and irresistible addition to any dessert table. Try the suggested variations, share your batch with friends, and enjoy the warmth of baking during the season.
Happy baking!

Chocolate Snowball Cookies – Festive Holiday Treats
Author: Patricia